Siril Main Interface
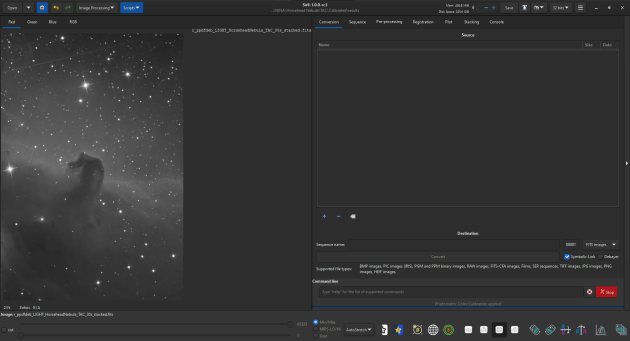
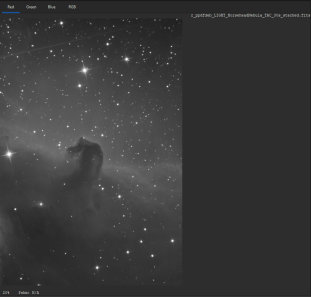
This large zone on the left displays the currently loaded image.
For RGB[1] images, you can switch between Red, Green, Blue and RGB layers by clicking on the respective tabs at the top left.
For monochrome images, there is only one layer, named B&W.
The image panel can be maximized in Siril window by moving the separator with the tools panel to the right, or more simply by clicking on the long and thin vertical button at the extreme right.
The toolbar at the bottom can also be hidden by typing
control-T.
Adjust the high/low values to be displayed for the current image. Ticking
cutwill cut the histogram above/below the thresholds (for visualization only).
Select the stretch of scaling mode for visualization of the current image between:
- Linear
- Logarithm
- Square root
- Square
- Asinh (inverse hyperbolic sine)
- Autostretch, an automatic way to visualize deep sky images based on the image histogram
- Histogram equalization
The left button inverts the colors while the right button applies a rainbow colormap.
Warning
None of the transformations are effectively applied to the image, this is a visualization only mode.
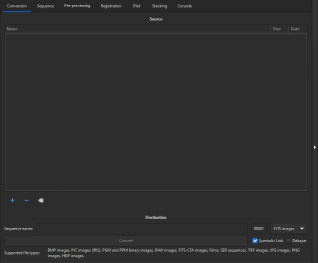
This panel on the right displays all the tools that can be used to manipulate or interact with sequences.
To process a sequence of images, you would normally use all the tabs:
- Conversion
- Sequence
- Pre-Processing
- Registration
- Plot
- Stacking
in that order from left to right.
The last tab to the right displays the Console, where Siril outputs information regarding the process being executed.
Tip
You can switch between the different tabs using F1, F2.... F7 keys.
You can also show/hide the panel by pressing the arrow to the right.

Display detailed information from the actions being executed.

Most of the tools implemented in Siril have their command line counterpart.
You can find the list of available commands and their syntax at https://free-astro.org/index.php?title=Siril:Commands
Tip
Clicking on the
Helpbutton at the end of the line once you have entered a command will display its syntax, show the possible or mandatory arguments, and a description of what it does.
The
Stopbutton stops the execution of the command currently being run, whether it has been started from the graphical user interface, typed in the command line or you launched from a script.
This zone displays the command currently being executed and its progress to completion.

If available, i.e. if the loaded image has been plate-solved or acquired as FITS with world coordinate system (WCS) information, you can display known objects annotations (left) and celestial grid with compass (right) using these buttons.
The known objects come from various catalogs that can be selected in the preferences or from manual addition of objects using the 'Search object...' entry of the contextual menu (right click in the image).

Switch to PSF/photometry mode. When enabled, clicking in the image will automatically select the area around the cursor and run the PSF analysis on it. This is equivalent to drawing a selection and using the 'PSF' entry of the contextual menu (right click in the image).
This gives information about a star in the area, and a link to know more about it from a Web source, if the loaded image has WCS information (has been plate-solved or acquired as FITS with this information saved).

Zoom in and Zoom out functions. One can zoom to fit the image to the window size and zoom to 100%.

Rotates or mirrors images

Open/Close histogram toolbox, also available from the Image processing menu.

Show/Hide list of images in the sequence with registration data. This list is used to browse the sequence, manually exclude frames from it, view registration data like FWHM for each image and set the reference image. It is also available in the sequence tab.

Open a single file, any supported image type or single-file sequence like SER and films. The arrow lists recently opened images (only FITS and SER files).

Change current working directory. The curent working directory is displayed at the center of the top bar. This is where sequences will be searched for and files saved. It can be changed in scripts too using the cd command.

Undo / Redo function. When processing images from the graphical user interface, in particular with the image processing menu, you can go back to a previous very or cancel the recent modifications with un-do, and reapply them with re-do.

Display all the available scripts. Just select one in the dropdown menu to launch its exceution.
Tip
You can set the list of folders which contain scripts in the Preferences, accessible through the Main Menu or with Ctrl+P.

Display the number of processing threads, available RAM and free storage space.
The number of threads if obtained from the CPU information. It can be decreased to reduce the resources used by Siril during processing. Some functions will use less than this number if there is not enough memory available to parallelize some algorithms and avoid running out of memory or freezing the system. It can also be set in scripts using the setcpu command.
Siril uses by default 90% of the available memory for processing, this can be decreased in the preferences or with the setmem command. For more information about memory management, see the system resources page.
Tip
You can decrease the maximum number of threads using the +/- buttons or the mouse wheel after having clicked in the text box.

Save the current image (overwrites) with the left button. If you wish to save with an alternate name, use the Save As button to the right.
Warning
The image is saved in Linear Mode, so any preview setting applied for visualization will not be accounted for. If you get a dark image after using Save, please refer to this FAQ entry: why are exported images so dark?

Save a snapshot of the current view, with preview stretch applied and annotations if any.
You can choose between saving to a file or to the Clipboard.

Display the bitdepth of the current image.

Often called the 'hamburger menu' because of its three horizontal bars, this option menu gives access to non-image processing dialogs, like preferences, help and image-related content like the FITS header or plate-solving. See Option Menu.

