| Line 4: | Line 4: | ||
* [[Siril:Tutorial_sequence|Work on a sequence of converted images]] | * [[Siril:Tutorial_sequence|Work on a sequence of converted images]] | ||
* [[Siril:Tutorial_preprocessing|Pre-processing images]] | * [[Siril:Tutorial_preprocessing|Pre-processing images]] | ||
* [[Siril:Tutorial_manual_registration|Registration ( | * [[Siril:Tutorial_manual_registration|Registration (FWHM image alignment)]] | ||
* [[Siril:Tutorial_stacking|Stacking]] | * [[Siril:Tutorial_stacking|Stacking]] | ||
Revision as of 13:26, 2 August 2014
Siril processing tutorial
- → Convert your images in the FITS format Siril uses (image import)
- Work on a sequence of converted images
- Pre-processing images
- Registration (FWHM image alignment)
- Stacking
Convert your images in the FITS format Siril uses (image import)
To process your images with Siril, you must convert them to the FITS format it uses (16-bit unsigned, bottom-top order, 1 or 3 axes). Fortunately, Siril is able to convert some image formats to this format, mainly RAW, Tiff, Jpeg, PNG BMP and NetPBM binaries for images, AVI for films.
First, the working directory has to be set. Images will be taken from and converted to this directory. Click on "Change dir" at bottom right of the window to change it.
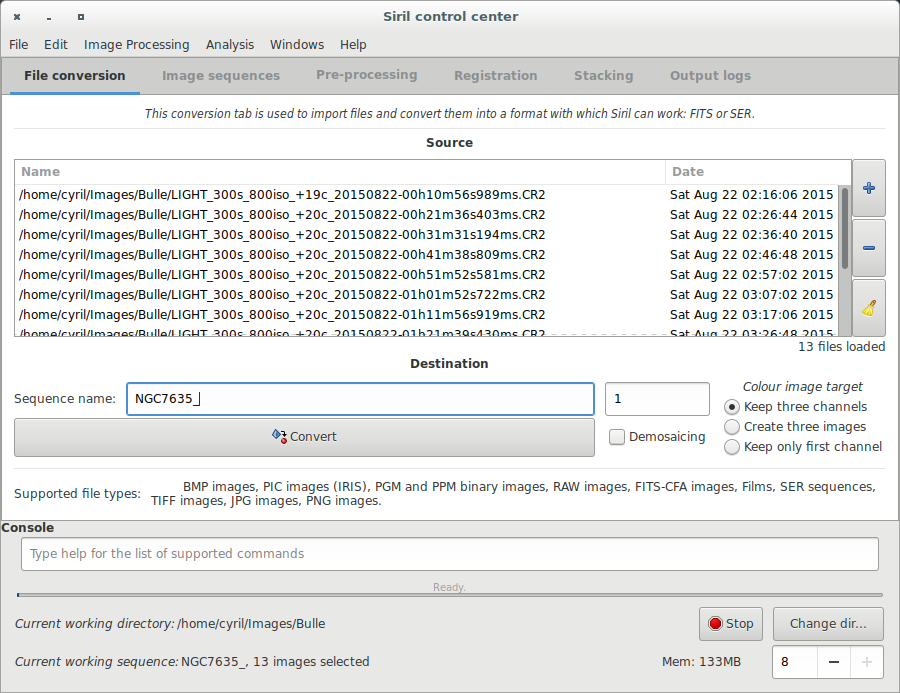
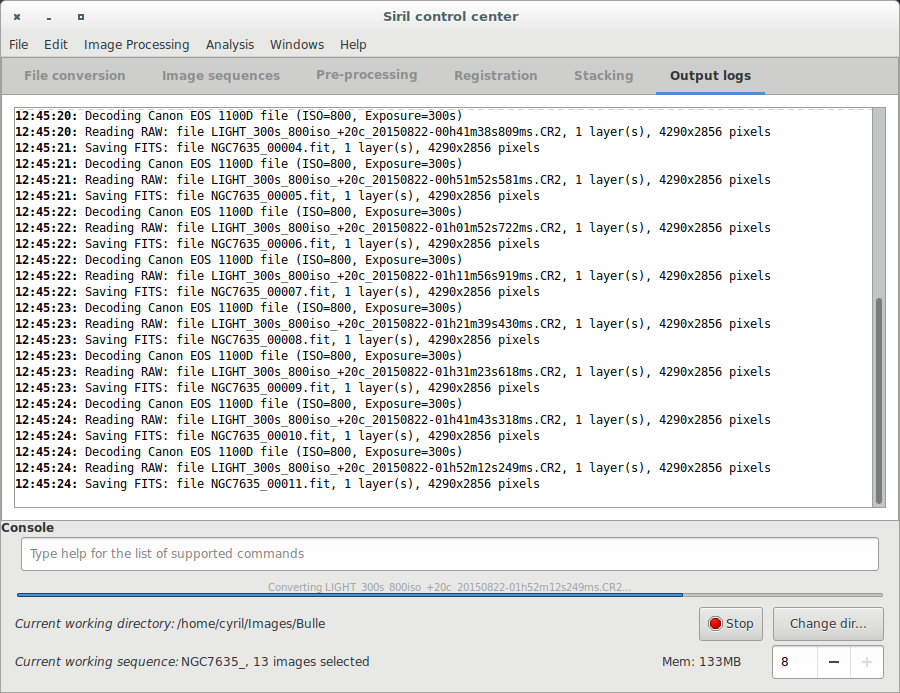
The fill of the boxes for source and destination file names for the conversion. Here are 2 screen captures of the conversion tab and when a sequence of images called IMG_{number}.CR2 is being converted to M8-M20_{same_number}.fit.
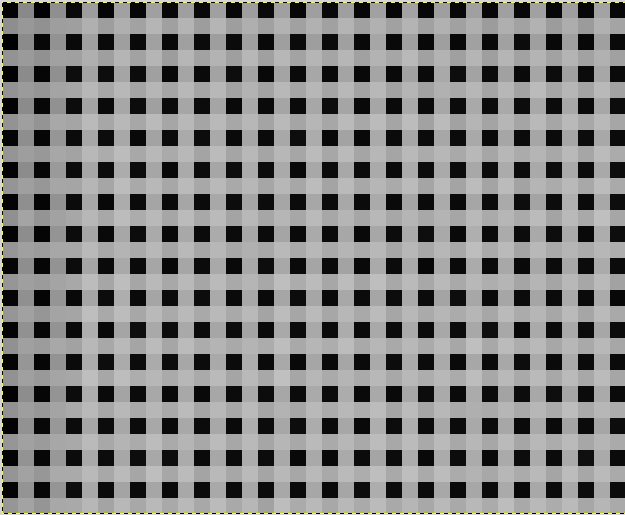
Note the message warning you that RAW files are converted to CFA (Color Filter Array) monochrome FITS picture. It is necessary to preprocess DSLR images with this mode. Indeed, due to Bayer matrix consideration, the RGB result of your RAW image is an interpolate picture. In consequence it is useless to preprocess these kind of interpolated data. Contrary to RGB image, CFA image represent the entire sensor data with the Bayer pattern. The following image shows you a crop of a CFA image. Note that the Bayer pattern (RGGB on this example) is visible.
Next item of the tutorial: Work on a sequence of converted images.


