New paragraph |
No edit summary |
||
| Line 19: | Line 19: | ||
<html5media width="750">http://free-astro.vinvin.tf/videos/Display.webm</html5media> | <html5media width="750">http://free-astro.vinvin.tf/videos/Display.webm</html5media> | ||
==Process your images== | ==Process your single images== | ||
*Background extraction | *Background extraction | ||
| Line 40: | Line 40: | ||
<html5media width="750">http://free-astro.vinvin.tf/videos/RemoveGreen.webm</html5media> | <html5media width="750">http://free-astro.vinvin.tf/videos/RemoveGreen.webm</html5media> | ||
==Tutorial for a complete processing== | ==Tutorial for a complete sequence processing== | ||
An illustrated tutorial has been compiled to describe the usual processing steps, starting from RAW DSLR images to stacking. | An illustrated tutorial has been compiled to describe the usual processing steps, starting from RAW DSLR images to stacking. | ||
Revision as of 08:32, 12 March 2014
Manual page for Siril
Siril is an astronomical image processing free software, see main page for more details.
A powerful astronomical image viewer
A Display Mode viewer is used to improve the visibility of an image, but without altering its pixel data in any way.
- Linear: This is the default mode in Siril. Pixels are displayed from the darkest to the brightest in a linear scale.
- Logarithm: Same than linear instead that here the scale is logarithmic. The operation emphase simultenaously information in faint and bright levels of the image.
- Square root: This transformation, takes the square root of each pixels. The result is close to the logarithm mode.
- Squared: Same than before but using the squared of each pixels.
- Asinh: The inverse hyperbolic sine is the most commonly used, it reproduces the perceptual ability of the human eye, which can accommodate to perceive dramatically different levels of brightness simultaneously. Asinh is close to the logarithm mode but has a better behavior around zero.
- Histogram: This mode increases the contrast of the image by increasing the dynamic range of intensity given to pixels with the most probable intensity values. It is very valuable to evaluate all the signal contained in the image.
All these modes can also be applied on each layer in an independent way.
This video tutorial shows the different modes you can use to display your images.
<html5media width="750">http://free-astro.vinvin.tf/videos/Display.webm</html5media>
Process your single images
- Background extraction
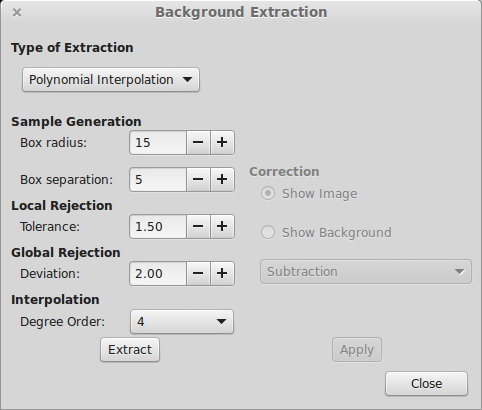
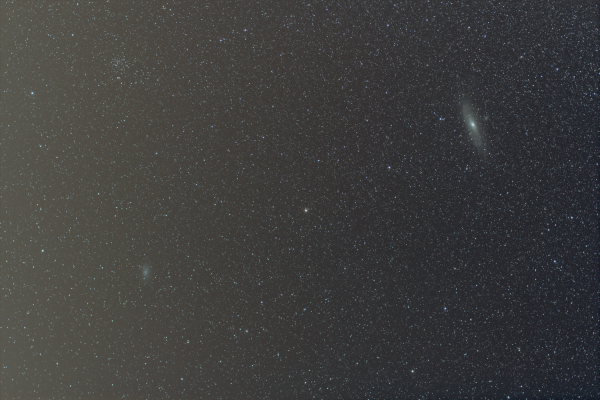
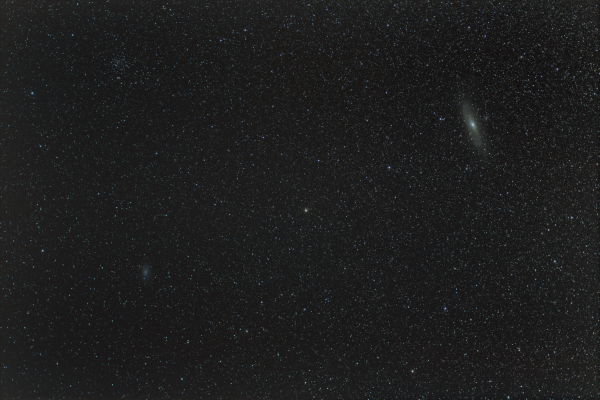
When your image contains an intense light pollution, it is useful to remove it. Siril provides a "Background Extraction" tool in order to remove the gradient of the sky background. So far, Siril uses a polynomial method where generally 3rd degree is a good choice. However, this tool allows you to choose between first and 4th degree.
Another tool is associated with Background Extraction : Sky Equalization. By clicking on Equalize, Siril will put the RGB values of the background to an homogeneous value; it is generally 12% of the total dynamic (you can controle it). For example, it corresponds on a 8-bit image, at a level of 30 / 255.
Following, respectively, the start image and final image (after background extraction and equalization):
- Reducing green tint in processed images
This video tutorial shows how to remove the green tint in processed images using the graphical user interface. This function can also be accessed from the command line, with the rmgreen command.
<html5media width="750">http://free-astro.vinvin.tf/videos/RemoveGreen.webm</html5media>
Tutorial for a complete sequence processing
An illustrated tutorial has been compiled to describe the usual processing steps, starting from RAW DSLR images to stacking.
- Convert your images in the FITS format Siril uses (image import)
- Work on a sequence of converted images
- Pre-processing images
- Registration (manual image alignment)
- Stacking
Astrometry
Siril provides a few astrometry tools.
In particular, the PSF function that uses the Levenberg–Marquardt algorithm for minimization. See the dedicated page for a video tutorial.


