Updating to match new version of source page |
Updating to match new version of source page |
||
| Line 6: | Line 6: | ||
* [[Siril:Tutorial_sequence|Work on a sequence of converted images]] | * [[Siril:Tutorial_sequence|Work on a sequence of converted images]] | ||
* [[Siril:Tutorial_preprocessing|Pre-processing images]] | * [[Siril:Tutorial_preprocessing|Pre-processing images]] | ||
* [[Siril:Tutorial_manual_registration|Registration ( | * [[Siril:Tutorial_manual_registration|Registration (Global star alignment)]] | ||
* → '''Stacking''' | * → '''Stacking''' | ||
| Line 13: | Line 13: | ||
The final step to do with Siril is to stack the images. Go to the "stacking" tab, indicate if you want to stack all images, only selected images or the best images regarding the value of FWHM previously computed. Siril proposes several algorithms for stacking computation. | The final step to do with Siril is to stack the images. Go to the "stacking" tab, indicate if you want to stack all images, only selected images or the best images regarding the value of FWHM previously computed. Siril proposes several algorithms for stacking computation. | ||
* Sum Stacking | * Sum Stacking | ||
This is the simplest algorithm: each pixel in the stack is summed using 32-bit precision, and the result is normalized to 16-bit. The increase in signal-to-noise ratio (SNR) is proportional to <math>\sqrt{N}</math>, where <math>N</math> is the number of images. | This is the simplest algorithm: each pixel in the stack is summed using 32-bit precision, and the result is normalized to 16-bit. The increase in signal-to-noise ratio (SNR) is proportional to <math>\sqrt{N}</math>, where <math>N</math> is the number of images. Because of the lack of normalisation, this method should only be used for planetary processing. | ||
* Average Stacking With Rejection | * Average Stacking With Rejection | ||
** Percentile Clipping: this is a one step rejection algorithm ideal for small sets of data (up to 6 images). | ** Percentile Clipping: this is a one step rejection algorithm ideal for small sets of data (up to 6 images). | ||
| Line 30: | Line 30: | ||
This algorithm is mainly used to construct long exposure star-trails images. | This algorithm is mainly used to construct long exposure star-trails images. | ||
Pixels of the image are replaced by pixels at the same coordinates if intensity is greater. | Pixels of the image are replaced by pixels at the same coordinates if intensity is greater. | ||
* Pixel Minimum Stacking | |||
This algorithm is mainly used for cropping sequence by removing black borders. | |||
Pixels of the image are replaced by pixels at the same coordinates if intensity is lower. | |||
In the case of | In the case of NGC7635 sequence, we first used the "Winsorized Sigma Clipping" algorithm in "Average stacking with rejection" section, in order to remove satellite tracks (<math>\sigma_{low}=4</math> and <math>\sigma_{high}=3</math>). | ||
[[File:Siril stacking screen.png]] | [[File:Siril stacking screen.png]] | ||
| Line 37: | Line 40: | ||
The output console thus gives the following result:<br> | The output console thus gives the following result:<br> | ||
<code> | <code> | ||
22:26:06: Pixel rejection in channel #0: 0.215% - 1.401%<br> | |||
22:26:06: Pixel rejection in channel #1: 0.185% - 1.273%<br> | |||
22:26:06: Pixel rejection in channel #2: 0.133% - 1.150%<br> | |||
22:26:06: Integration of 12 images:<br> | |||
22:26:06: Normalization ............. additive + scaling<br> | |||
22:26:06: Pixel rejection ........... Winsorized sigma clipping<br> | |||
22:26:06: Rejection parameters ...... low=4.000 high=3.000<br> | |||
22:26:09: Saving FITS: file NGC7635.fit, 3 layer(s), 4290x2856 pixels<br> | |||
22:26:19: Background noise value (channel: #0): 10.013 (1.528e-04)<br> | |||
22:26:19: Background noise value (channel: #1): 6.755 (1.031e-04)<br> | |||
22:26:19: Background noise value (channel: #2): 6.621 (1.010e-04)<br> | |||
</code> | </code> | ||
[[File:Siril stacking result.png|700px]] | [[File:Siril stacking result.png|700px]] | ||
After that, the result is saved in the file named below the buttons, and is displayed in the grey and colour windows. You can adjust levels if you want to see it better, or use the | After that, the result is saved in the file named below the buttons, and is displayed in the grey and colour windows. You can adjust levels if you want to see it better, or use the differe1nt display mode. In our example the file is the stack result of all files, i.e., 12 files. | ||
[[File:Siril inal_result.png|700px]] | [[File:Siril inal_result.png|700px]] | ||
The images above picture the result in Siril using the | The images above picture the result in Siril using the Auto-Stretch rendering mode. Note the improvement of the signal-to-noise ratio regarding the result given for one frame in the previous [[Siril:Tutorial_preprocessing|step]] (take a look to the sigma value). The increase in SNR is of <math>19.7/6.4 = 3.08 \approx \sqrt{12} = 3.46</math> and you should try to improve this result adjusting <math>\sigma_{low}</math> and <math>\sigma_{high}</math>. | ||
[[File:Siril_Comparison_sigma.png|700px]] | [[File:Siril_Comparison_sigma.png|700px]] | ||
Now should start the process of the image with crop, background extraction (to remove gradient), and some other processes to enhance your image. To see processes available in Siril please visit this [[Siril:Manual|page]]. | Now should start the process of the image with crop, background extraction (to remove gradient), and some other processes to enhance your image. To see processes available in Siril please visit this [[Siril:Manual|page]]. | ||
Revision as of 12:25, 11 April 2016
Siril processing tutorial
- Convert your images in the FITS format Siril uses (image import)
- Work on a sequence of converted images
- Pre-processing images
- Registration (Global star alignment)
- → Stacking
Empilement
The final step to do with Siril is to stack the images. Go to the "stacking" tab, indicate if you want to stack all images, only selected images or the best images regarding the value of FWHM previously computed. Siril proposes several algorithms for stacking computation.
- Sum Stacking
This is the simplest algorithm: each pixel in the stack is summed using 32-bit precision, and the result is normalized to 16-bit. The increase in signal-to-noise ratio (SNR) is proportional to [math]\displaystyle{ \sqrt{N} }[/math], where [math]\displaystyle{ N }[/math] is the number of images. Because of the lack of normalisation, this method should only be used for planetary processing.
- Average Stacking With Rejection
- Percentile Clipping: this is a one step rejection algorithm ideal for small sets of data (up to 6 images).
- Sigma Clipping: this is an iterative algorithm which will reject pixels whose distance from median will be farthest than two given values in sigma units ([math]\displaystyle{ \sigma_{low} }[/math], [math]\displaystyle{ \sigma_{high} }[/math]).
- Median Sigma Clipping: this is the same algorithm except than the rejected pixels are replaced by the median value of the stack.
- Winsorized Sigma Clipping: this is very similar to Sigma Clipping method but it uses an algorithm based on Huber's work [1] [2].
- Linear Fit Clipping: this is an algorithm developed by Juan Conejero, main developer of PixInsight [2]. It fits the best straight line ([math]\displaystyle{ y=ax+b }[/math]) of the pixel stack and rejects outliers. This algorithm performs very well with large stacks and images containing sky gradients with differing spatial distributions and orientations.
These algorithms are very efficient to remove satellite/plane tracks.
- Median Stacking
This method is mostly used for dark/flat/offset stacking. The median value of the pixels in the stack is computed for each pixel. As this method should only be used for dark/flat/offset stacking, it does not take into account shifts computed during registration. The increase in SNR is proportional to [math]\displaystyle{ 0.8\sqrt{N} }[/math].
- Pixel Maximum Stacking
This algorithm is mainly used to construct long exposure star-trails images. Pixels of the image are replaced by pixels at the same coordinates if intensity is greater.
- Pixel Minimum Stacking
This algorithm is mainly used for cropping sequence by removing black borders. Pixels of the image are replaced by pixels at the same coordinates if intensity is lower.
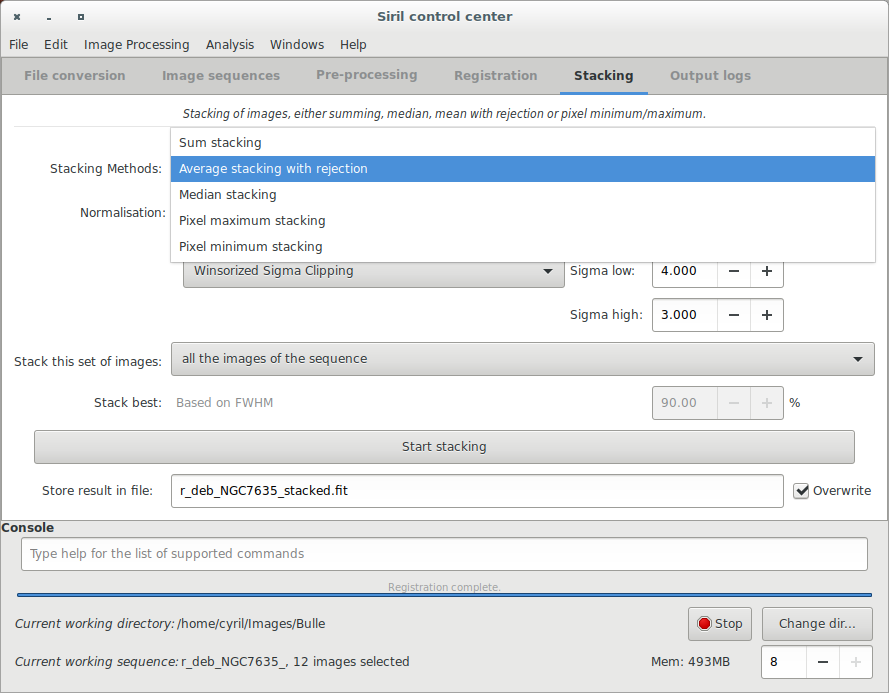
In the case of NGC7635 sequence, we first used the "Winsorized Sigma Clipping" algorithm in "Average stacking with rejection" section, in order to remove satellite tracks ([math]\displaystyle{ \sigma_{low}=4 }[/math] and [math]\displaystyle{ \sigma_{high}=3 }[/math]).
The output console thus gives the following result:
22:26:06: Pixel rejection in channel #0: 0.215% - 1.401%

22:26:06: Pixel rejection in channel #1: 0.185% - 1.273%

22:26:06: Pixel rejection in channel #2: 0.133% - 1.150%

22:26:06: Integration of 12 images:

22:26:06: Normalization ............. additive + scaling

22:26:06: Pixel rejection ........... Winsorized sigma clipping

22:26:06: Rejection parameters ...... low=4.000 high=3.000

22:26:09: Saving FITS: file NGC7635.fit, 3 layer(s), 4290x2856 pixels

22:26:19: Background noise value (channel: #0): 10.013 (1.528e-04)

22:26:19: Background noise value (channel: #1): 6.755 (1.031e-04)

22:26:19: Background noise value (channel: #2): 6.621 (1.010e-04)
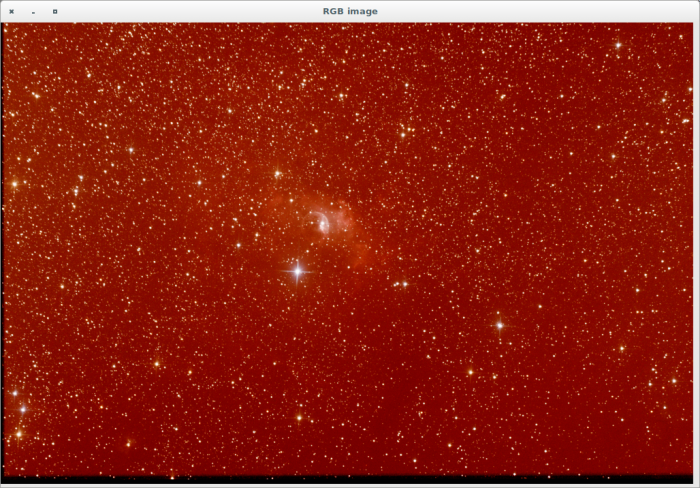
After that, the result is saved in the file named below the buttons, and is displayed in the grey and colour windows. You can adjust levels if you want to see it better, or use the differe1nt display mode. In our example the file is the stack result of all files, i.e., 12 files.
The images above picture the result in Siril using the Auto-Stretch rendering mode. Note the improvement of the signal-to-noise ratio regarding the result given for one frame in the previous step (take a look to the sigma value). The increase in SNR is of [math]\displaystyle{ 19.7/6.4 = 3.08 \approx \sqrt{12} = 3.46 }[/math] and you should try to improve this result adjusting [math]\displaystyle{ \sigma_{low} }[/math] and [math]\displaystyle{ \sigma_{high} }[/math].
Now should start the process of the image with crop, background extraction (to remove gradient), and some other processes to enhance your image. To see processes available in Siril please visit this page.
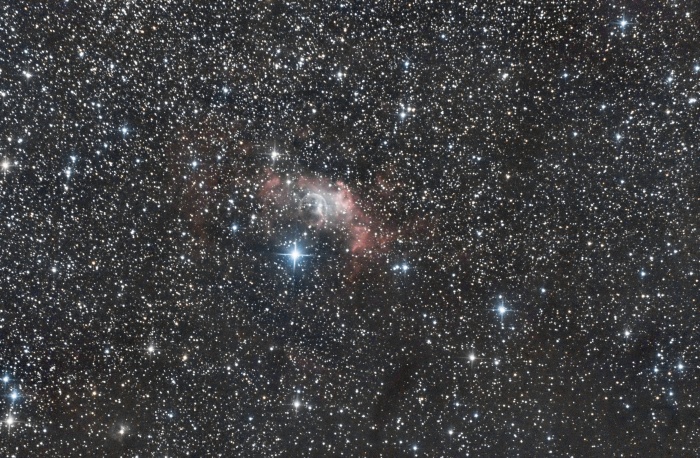
Here an example of what you can get with Siril:

End of the processing tutorial. Return to the main documentation page for more illustrated tutorials.


