Updating to match new version of source page |
Updating to match new version of source page |
||
| Line 13: | Line 13: | ||
Pour débuter le pré-traitement de vos images avec Siril, vous devez les convertir au format FITS (16-bit non signés, bottom-top, 1 ou 3 axes). Heureusement, Siril est capable de convertir plusieurs types d'images dans ce format : RAW, TIFF, JPEG, PIC (format de Iris, ©Christian Buil), PNG, BMP et NetPBM (binaires) pour les images, AVI pour les films. | Pour débuter le pré-traitement de vos images avec Siril, vous devez les convertir au format FITS (16-bit non signés, bottom-top, 1 ou 3 axes). Heureusement, Siril est capable de convertir plusieurs types d'images dans ce format : RAW, TIFF, JPEG, PIC (format de Iris, ©Christian Buil), PNG, BMP et NetPBM (binaires) pour les images, AVI pour les films. | ||
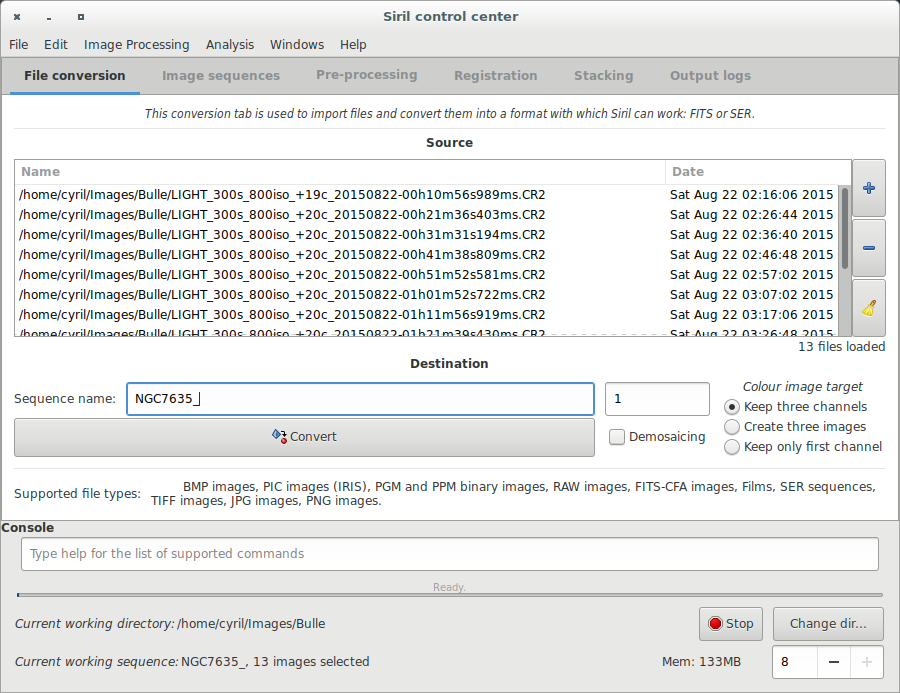
First, the working directory has to be set. Images will be converted to this directory. Click on "Change dir" at bottom right of the window to change it or type cd [ | First, the working directory has to be set. Images will be converted to this directory. Click on "Change dir" at bottom right of the window to change it or type [[Siril:Commands#cd|cd]] [your directory] in the console input command. | ||
Click on the "+" button to add the files to be converted. All supported formats can be selected at same time and will be converted in a sequence of files starting with the generic name you've specified just below. Created file names will be in the form <code>Name_XXX</code>, where XXX is the number of each image in the sequence. The button "Demosaicing" must be unchecked int order to convert RAW files into CFA ([https://en.wikipedia.org/wiki/Color_filter_array Color Filter Array]) monochrome FITS pictures, a necessary step to pre-process DSLR images. | |||
<code>Name_XXX</code> | |||
[[File:Siril_conversion_screen.png]] | [[File:Siril_conversion_screen.png]] | ||
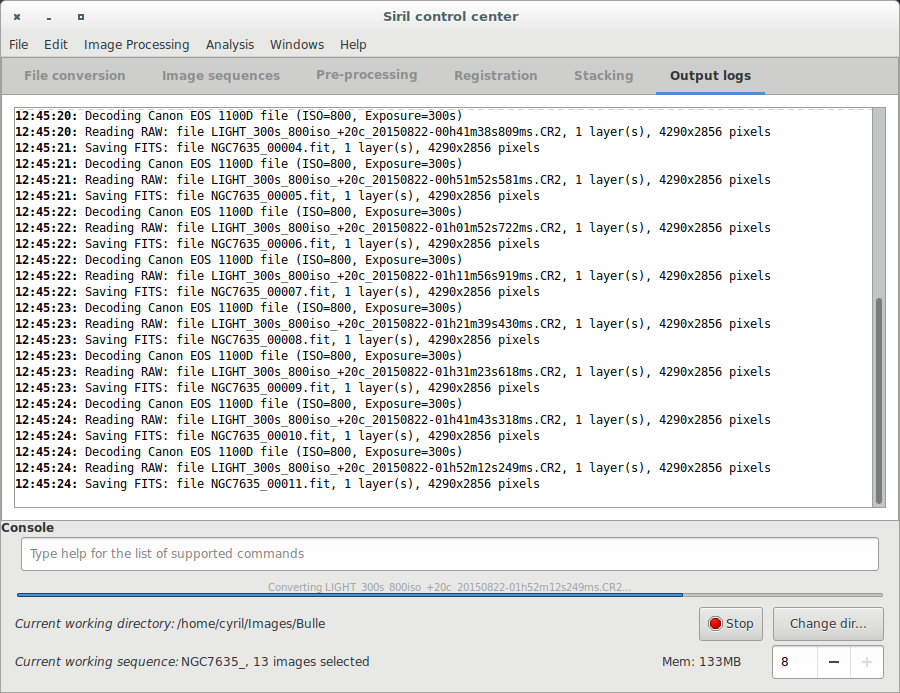
[[File:Siril_conversion_screen2.png]] | [[File:Siril_conversion_screen2.png]] | ||
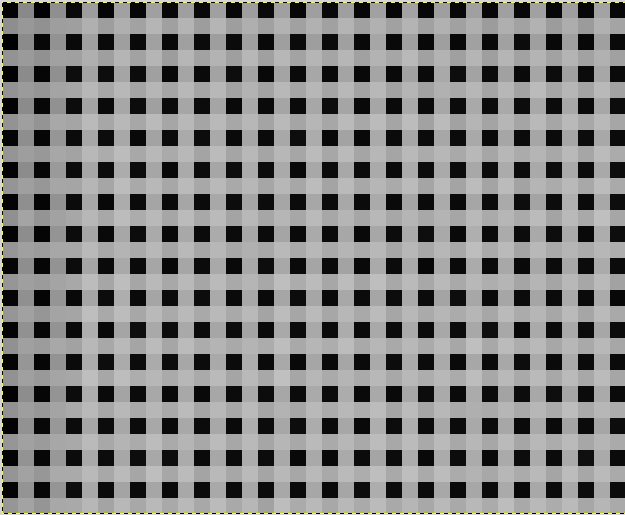
Indeed, due to Bayer matrix consideration, the RGB result of your RAW image is an interpolated picture. In consequence pre-processing interpolated data will give wrong results. Contrary to RGB image, CFA image represent the entire sensor data with the Bayer pattern. The following image shows you a crop of a CFA image. Note that the Bayer pattern (RGGB on this example) is visible. | |||
[[File:Siril_Bayer_Pattern.png]] | [[File:Siril_Bayer_Pattern.png]] | ||
Prochain sujet du tutoriel: [[Siril:Tutorial_sequence|Travail sur une séquence d'images converties]]. | Prochain sujet du tutoriel: [[Siril:Tutorial_sequence|Travail sur une séquence d'images converties]]. | ||
Revision as of 11:55, 11 April 2016
Tutoriel sur le pré-traitement
- → Convertir vos images dans le format FITS utilisé par Siril (importation d'images)
- Travail sur une séquence d'images converties
- Pre-traitement d'images
- Registration sur une étoile (PSF)
- Empilement
Convertir vos images dans le format FITS utilisé par Siril (importation d'images)
Pour débuter le pré-traitement de vos images avec Siril, vous devez les convertir au format FITS (16-bit non signés, bottom-top, 1 ou 3 axes). Heureusement, Siril est capable de convertir plusieurs types d'images dans ce format : RAW, TIFF, JPEG, PIC (format de Iris, ©Christian Buil), PNG, BMP et NetPBM (binaires) pour les images, AVI pour les films.
First, the working directory has to be set. Images will be converted to this directory. Click on "Change dir" at bottom right of the window to change it or type cd [your directory] in the console input command.
Click on the "+" button to add the files to be converted. All supported formats can be selected at same time and will be converted in a sequence of files starting with the generic name you've specified just below. Created file names will be in the form Name_XXX, where XXX is the number of each image in the sequence. The button "Demosaicing" must be unchecked int order to convert RAW files into CFA (Color Filter Array) monochrome FITS pictures, a necessary step to pre-process DSLR images.
Indeed, due to Bayer matrix consideration, the RGB result of your RAW image is an interpolated picture. In consequence pre-processing interpolated data will give wrong results. Contrary to RGB image, CFA image represent the entire sensor data with the Bayer pattern. The following image shows you a crop of a CFA image. Note that the Bayer pattern (RGGB on this example) is visible.
Prochain sujet du tutoriel: Travail sur une séquence d'images converties.


