adding translation markup |
Marked this version for translation |
||
| Line 2: | Line 2: | ||
<translate> | <translate> | ||
=Siril processing tutorial= | =Siril processing tutorial= <!--T:1--> | ||
<!--T:2--> | |||
* [[Siril:Tutorial_import|Convert your images in the FITS format Siril uses (image import)]] | * [[Siril:Tutorial_import|Convert your images in the FITS format Siril uses (image import)]] | ||
* [[Siril:Tutorial_sequence|Work on a sequence of converted images]] | * [[Siril:Tutorial_sequence|Work on a sequence of converted images]] | ||
| Line 10: | Line 11: | ||
* [[Siril:Tutorial_stacking|Stacking]] | * [[Siril:Tutorial_stacking|Stacking]] | ||
==Pre-processing images== | ==Pre-processing images== <!--T:3--> | ||
<!--T:4--> | |||
Once a sequence is loaded, images can be pre-processed, registered and stacked. The pre-processing is an optional (but important) step and involves offset, dark and flat frames. | Once a sequence is loaded, images can be pre-processed, registered and stacked. The pre-processing is an optional (but important) step and involves offset, dark and flat frames. | ||
<!--T:5--> | |||
* BIAS (OFFSET) | * BIAS (OFFSET) | ||
A BIAS frame is an image with the shutter closed and the shortest possible exposure time. Basically it corresponds to an exposure of 1/4000s with modern DSLRs. The BIAS shows the electronic noise and readout signal of the camera and the more BIAS exposures are used for the calculation of the master BIAS, the less noise will be introduced into the corrected images. | A BIAS frame is an image with the shutter closed and the shortest possible exposure time. Basically it corresponds to an exposure of 1/4000s with modern DSLRs. The BIAS shows the electronic noise and readout signal of the camera and the more BIAS exposures are used for the calculation of the master BIAS, the less noise will be introduced into the corrected images. | ||
Note that BIAS frames MUST be taken at the same ISO than light frames. | Note that BIAS frames MUST be taken at the same ISO than light frames. | ||
<!--T:6--> | |||
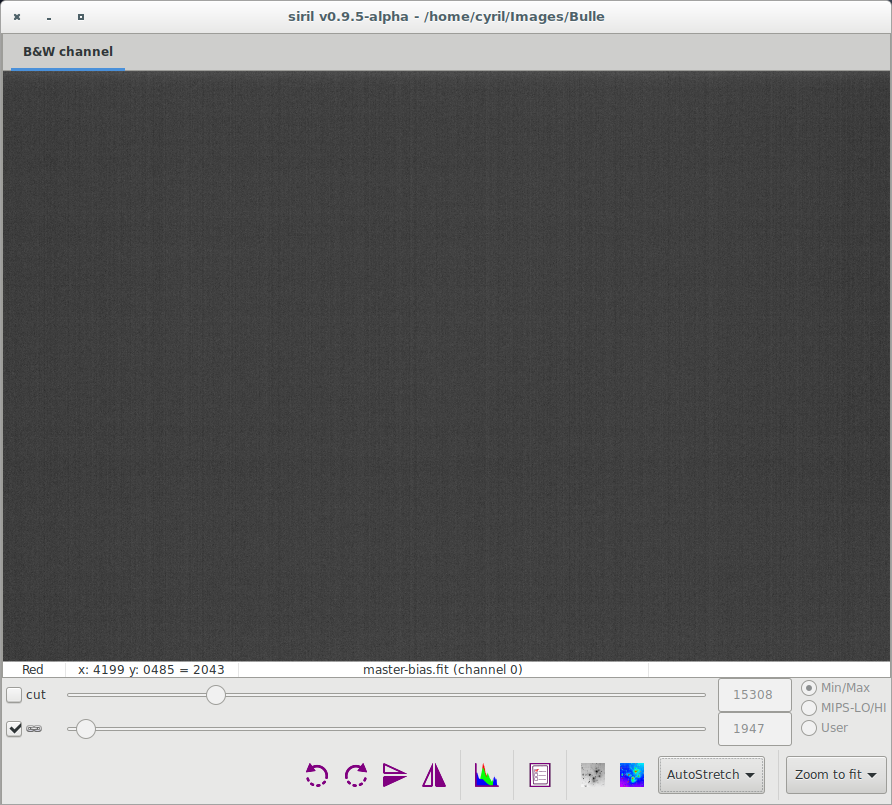
Here, a master BIAS, calculated from 10 single images with median method. | Here, a master BIAS, calculated from 10 single images with median method. | ||
[[File:Siril_Offset.png]] | [[File:Siril_Offset.png]] | ||
<!--T:7--> | |||
* DARK | * DARK | ||
Dark frames are made at the same exposure time and ISO as the subject light frames but in the dark: use your lens/telescope cap for example. They should also be made at approximately the same temperature as the light frames, this is the reason why we make dark frames at the end, or in the middle of the imaging session. The dark frames are used to remove the dark signal from the light frames and like the BIAS frames, the more dark exposures are used for the calculation of the master dark, the less noise will be introduced into the corrected images. | Dark frames are made at the same exposure time and ISO as the subject light frames but in the dark: use your lens/telescope cap for example. They should also be made at approximately the same temperature as the light frames, this is the reason why we make dark frames at the end, or in the middle of the imaging session. The dark frames are used to remove the dark signal from the light frames and like the BIAS frames, the more dark exposures are used for the calculation of the master dark, the less noise will be introduced into the corrected images. | ||
<!--T:8--> | |||
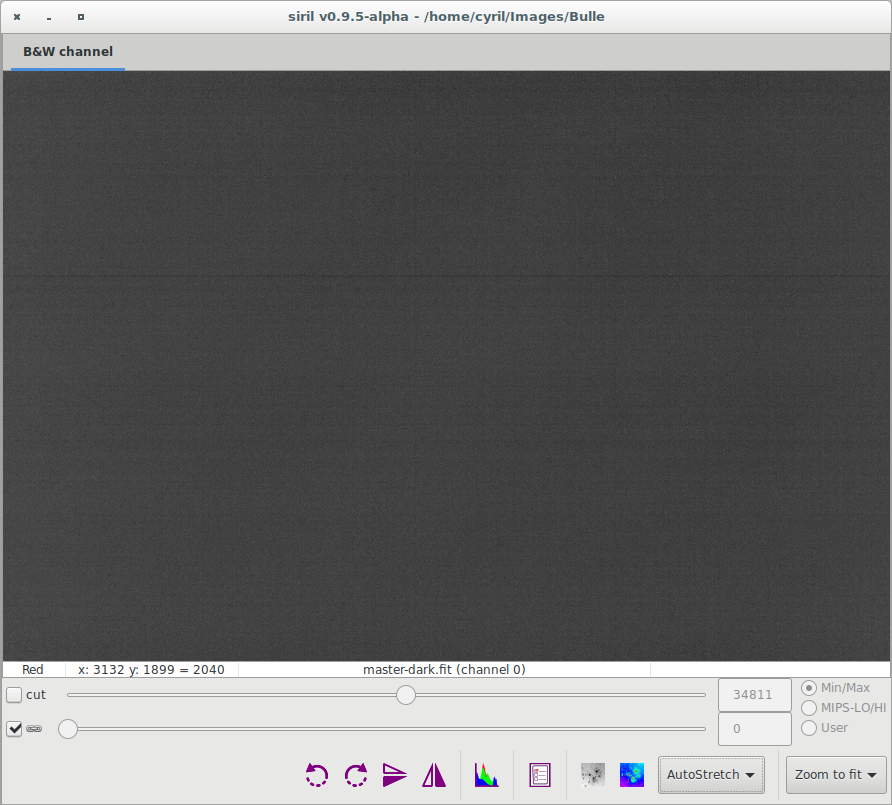
Here, a master dark, calculated from 10 single images with median method. | Here, a master dark, calculated from 10 single images with median method. | ||
[[File:Siril_Dark.png]] | [[File:Siril_Dark.png]] | ||
<!--T:9--> | |||
* FLAT | * FLAT | ||
Telescopes usually do not illuminate the detector homogeneously. Moreover, dust on optical surfaces and sensor lead to dark spots on resulting image. To correct these effects one need to divide each light images by the master flat which is the median of single exposure of a homogeneously illuminated area. | Telescopes usually do not illuminate the detector homogeneously. Moreover, dust on optical surfaces and sensor lead to dark spots on resulting image. To correct these effects one need to divide each light images by the master flat which is the median of single exposure of a homogeneously illuminated area. | ||
<!--T:10--> | |||
Siril automatically evaluates the normalisation coefficient used in the flat division. However, this value can be over-evaluated and in this case you will be warned into the console output. | Siril automatically evaluates the normalisation coefficient used in the flat division. However, this value can be over-evaluated and in this case you will be warned into the console output. | ||
For example you can have this output : | For example you can have this output : | ||
<!--T:11--> | |||
<tt>Overflow detected, change level value in settings: 3278.00 is too high.</tt> | <tt>Overflow detected, change level value in settings: 3278.00 is too high.</tt> | ||
<!--T:12--> | |||
So, the solution consists to uncheck the auto-evaluation in settings and define your own value, smaller than 3278 in this example. | So, the solution consists to uncheck the auto-evaluation in settings and define your own value, smaller than 3278 in this example. | ||
<!--T:13--> | |||
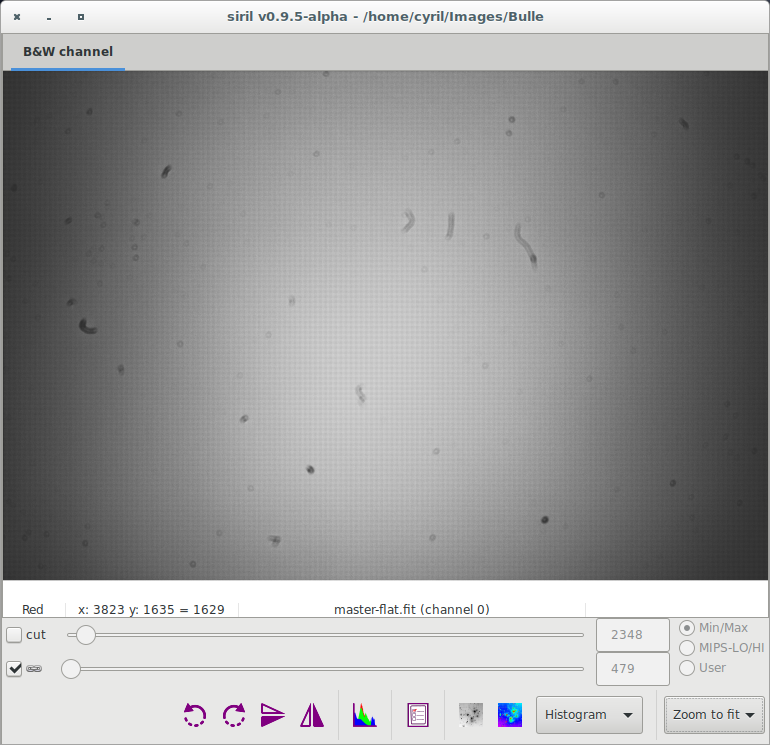
Here, a master flat, calculated from 10 single images with median method. Note that vignetting and dust are visible. Bayer pattern is also visible. | Here, a master flat, calculated from 10 single images with median method. Note that vignetting and dust are visible. Bayer pattern is also visible. | ||
<!--T:14--> | |||
[[File:Siril_Flat.png]] | [[File:Siril_Flat.png]] | ||
<!--T:15--> | |||
Only one frame can be given for each of these three, and it has to be in Siril's FITS format. They should be created by median stacking, so you need to convert the source images to FITS, load the sequence and stack them before using them here. We'll assume this is done. For more info about stacking, see the [[Siril:Manual#Stacking]] section below. | Only one frame can be given for each of these three, and it has to be in Siril's FITS format. They should be created by median stacking, so you need to convert the source images to FITS, load the sequence and stack them before using them here. We'll assume this is done. For more info about stacking, see the [[Siril:Manual#Stacking]] section below. | ||
<!--T:16--> | |||
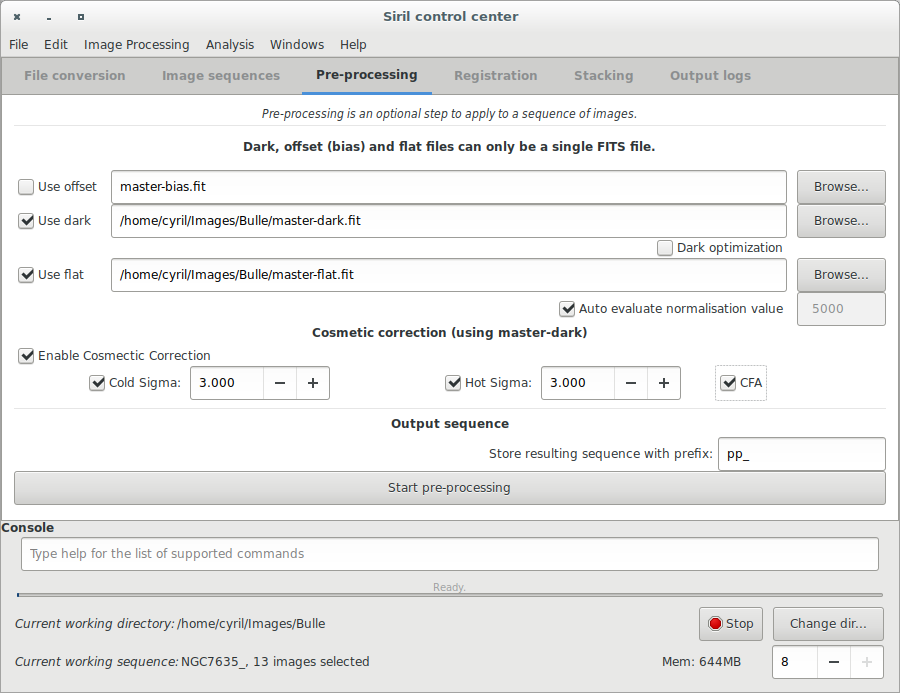
The pre-processing does not overwrites original FITS files from the sequence but creates new FITS files with the pre-processed data. The new file names are the same than the original prefixed with pp_ if you leave the default value in the prefix box. Below is an example of pre-processing using offset and dark files. | The pre-processing does not overwrites original FITS files from the sequence but creates new FITS files with the pre-processed data. The new file names are the same than the original prefixed with pp_ if you leave the default value in the prefix box. Below is an example of pre-processing using offset and dark files. | ||
Make sure that loaded sequence is the sequence of your light frames. | Make sure that loaded sequence is the sequence of your light frames. | ||
<!--T:17--> | |||
[[File:Siril preprocessing screen.png]] | [[File:Siril preprocessing screen.png]] | ||
<!--T:18--> | |||
* Result of pre-processing | * Result of pre-processing | ||
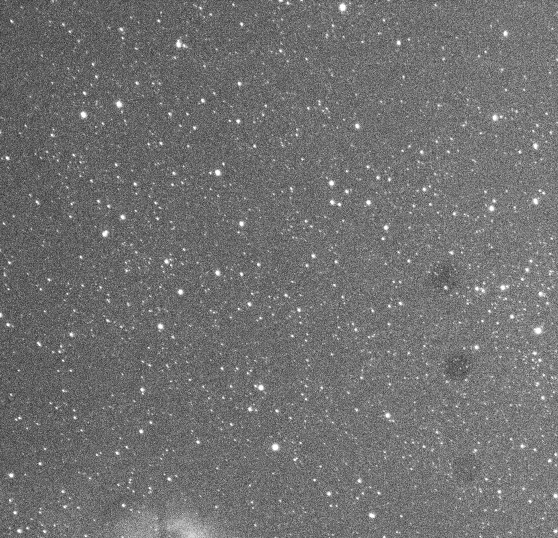
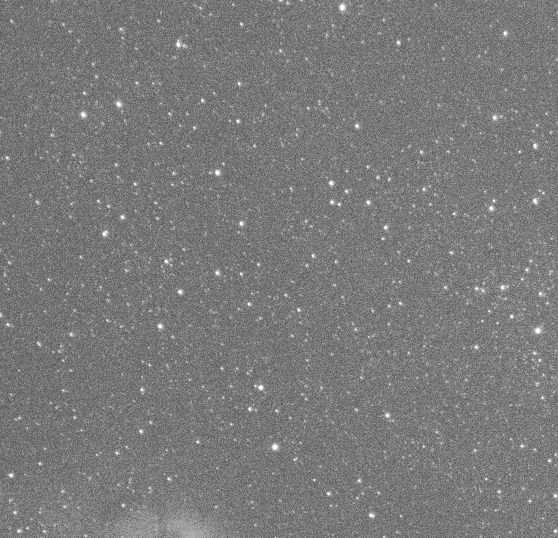
The result of a single frame pre-processed is given below. Note how dust have been removed from the light frame. | The result of a single frame pre-processed is given below. Note how dust have been removed from the light frame. | ||
<!--T:19--> | |||
[[File:Siril_before_DOF.png]] | [[File:Siril_before_DOF.png]] | ||
[[File:Siril_after_DOF.png]] | [[File:Siril_after_DOF.png]] | ||
<!--T:20--> | |||
Another example of a well executed pre-processing stage is illustrated in the next animation. Look how the pixels of the thermic signal are removed from the picture. | Another example of a well executed pre-processing stage is illustrated in the next animation. Look how the pixels of the thermic signal are removed from the picture. | ||
<!--T:21--> | |||
[[File:DOF.gif]] | [[File:DOF.gif]] | ||
<!--T:22--> | |||
* Demosaicing (for Bayer-Pattern images only) | * Demosaicing (for Bayer-Pattern images only) | ||
Last step in pre-processing images consist in getting back Red, Green and Blue channels using interpolation algorithms. To do that, Siril gives the choice between 4 different algorithms. | Last step in pre-processing images consist in getting back Red, Green and Blue channels using interpolation algorithms. To do that, Siril gives the choice between 4 different algorithms. | ||
| Line 66: | Line 86: | ||
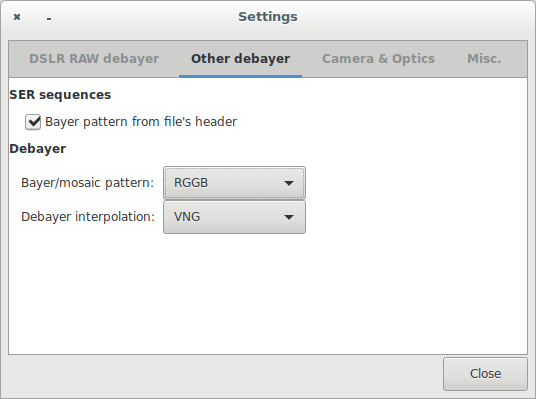
Make your choice in the window below by clicking on Settings and Debayer tab. | Make your choice in the window below by clicking on Settings and Debayer tab. | ||
<!--T:23--> | |||
[[File:Siril_Debayer.png]]. | [[File:Siril_Debayer.png]]. | ||
<!--T:24--> | |||
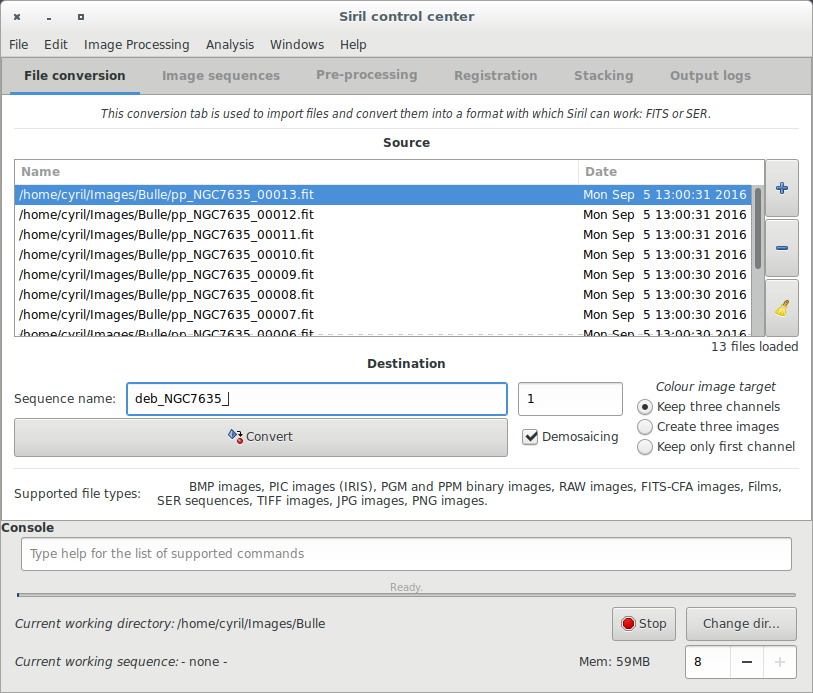
To process the demosaicing, go back to Conversion Tab and fill the field as the example below: | To process the demosaicing, go back to Conversion Tab and fill the field as the example below: | ||
<!--T:25--> | |||
[[File:Siril_conversion_demosaicing.png]] | [[File:Siril_conversion_demosaicing.png]] | ||
<!--T:26--> | |||
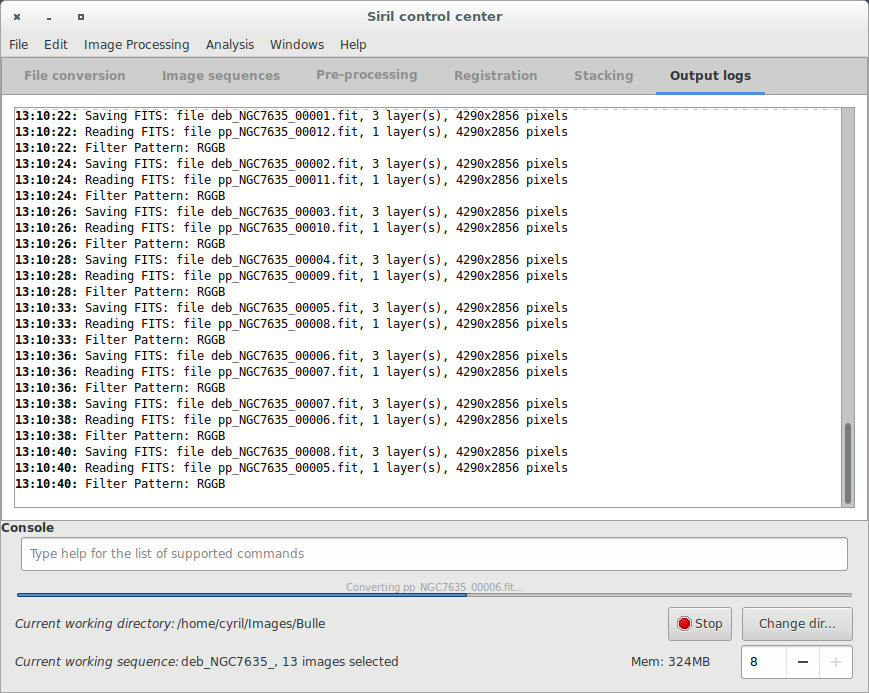
Then click on the Debayer Button which should be sensitive. The demosaicing process should start and will take some time following the method you used and the CPU you own. | Then click on the Debayer Button which should be sensitive. The demosaicing process should start and will take some time following the method you used and the CPU you own. | ||
<!--T:27--> | |||
[[File:Siril_during_demosaicing.png]] | [[File:Siril_during_demosaicing.png]] | ||
<!--T:28--> | |||
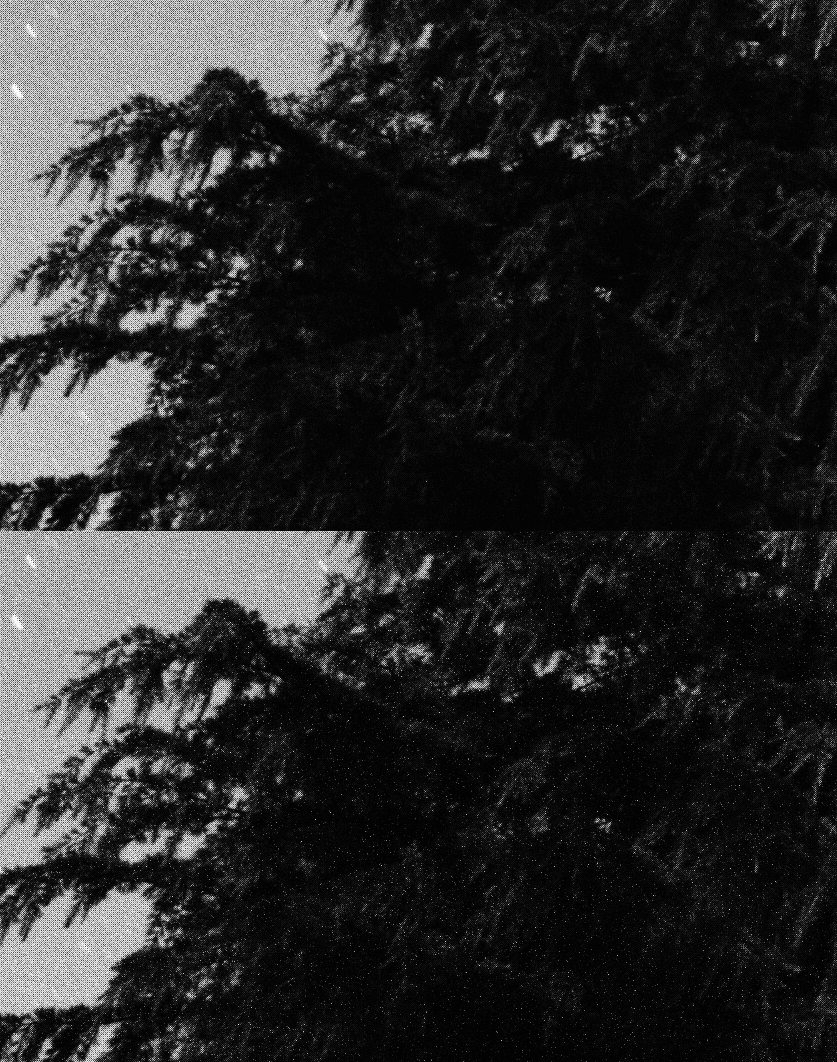
Finally you will have a new set of pre-processed light frames that you could register. Please note that at this stage you always have a lot of noise in your image. Indeed, pre-processing images with Dark, Bias and Flat do not remove noise but unwanted signal. The following Picture shows you the result of demosaicing. It is displayed in Histogram Equalization mode in order to enhanced the visibility of signal but without altering your image. | Finally you will have a new set of pre-processed light frames that you could register. Please note that at this stage you always have a lot of noise in your image. Indeed, pre-processing images with Dark, Bias and Flat do not remove noise but unwanted signal. The following Picture shows you the result of demosaicing. It is displayed in Histogram Equalization mode in order to enhanced the visibility of signal but without altering your image. | ||
<!--T:29--> | |||
[[File:Siril_demosaicing_final.png]] | [[File:Siril_demosaicing_final.png]] | ||
<!--T:30--> | |||
Next item of the tutorial: [[Siril:Tutorial_manual_registration|Registration (manual image alignment)]]. | Next item of the tutorial: [[Siril:Tutorial_manual_registration|Registration (manual image alignment)]]. | ||
</translate> | </translate> | ||
Revision as of 13:57, 14 October 2014
Siril processing tutorial
- Convert your images in the FITS format Siril uses (image import)
- Work on a sequence of converted images
- → Pre-processing images
- Registration (PSF image alignment)
- Stacking
Pre-processing images
Once a sequence is loaded, images can be pre-processed, registered and stacked. The pre-processing is an optional (but important) step and involves offset, dark and flat frames.
- BIAS (OFFSET)
A BIAS frame is an image with the shutter closed and the shortest possible exposure time. Basically it corresponds to an exposure of 1/4000s with modern DSLRs. The BIAS shows the electronic noise and readout signal of the camera and the more BIAS exposures are used for the calculation of the master BIAS, the less noise will be introduced into the corrected images. Note that BIAS frames MUST be taken at the same ISO than light frames.
Here, a master BIAS, calculated from 10 single images with median method.
- DARK
Dark frames are made at the same exposure time and ISO as the subject light frames but in the dark: use your lens/telescope cap for example. They should also be made at approximately the same temperature as the light frames, this is the reason why we make dark frames at the end, or in the middle of the imaging session. The dark frames are used to remove the dark signal from the light frames and like the BIAS frames, the more dark exposures are used for the calculation of the master dark, the less noise will be introduced into the corrected images.
Here, a master dark, calculated from 10 single images with median method.
- FLAT
Telescopes usually do not illuminate the detector homogeneously. Moreover, dust on optical surfaces and sensor lead to dark spots on resulting image. To correct these effects one need to divide each light images by the master flat which is the median of single exposure of a homogeneously illuminated area.
Siril automatically evaluates the normalisation coefficient used in the flat division. However, this value can be over-evaluated and in this case you will be warned into the console output. For example you can have this output :
Overflow detected, change level value in settings: 3278.00 is too high.
So, the solution consists to uncheck the auto-evaluation in settings and define your own value, smaller than 3278 in this example.
Here, a master flat, calculated from 10 single images with median method. Note that vignetting and dust are visible. Bayer pattern is also visible.
Only one frame can be given for each of these three, and it has to be in Siril's FITS format. They should be created by median stacking, so you need to convert the source images to FITS, load the sequence and stack them before using them here. We'll assume this is done. For more info about stacking, see the Siril:Manual#Stacking section below.
The pre-processing does not overwrites original FITS files from the sequence but creates new FITS files with the pre-processed data. The new file names are the same than the original prefixed with pp_ if you leave the default value in the prefix box. Below is an example of pre-processing using offset and dark files. Make sure that loaded sequence is the sequence of your light frames.
- Result of pre-processing
The result of a single frame pre-processed is given below. Note how dust have been removed from the light frame.
Another example of a well executed pre-processing stage is illustrated in the next animation. Look how the pixels of the thermic signal are removed from the picture.
- Demosaicing (for Bayer-Pattern images only)
Last step in pre-processing images consist in getting back Red, Green and Blue channels using interpolation algorithms. To do that, Siril gives the choice between 4 different algorithms. - VNG (default) - Bilinear (low quality but fast) - AHD - Super Pixel (no interpolation, the pattern RGGB, or other, is used as a super pixel and the image size is divided by four). Make your choice in the window below by clicking on Settings and Debayer tab.
To process the demosaicing, go back to Conversion Tab and fill the field as the example below:
Then click on the Debayer Button which should be sensitive. The demosaicing process should start and will take some time following the method you used and the CPU you own.
Finally you will have a new set of pre-processed light frames that you could register. Please note that at this stage you always have a lot of noise in your image. Indeed, pre-processing images with Dark, Bias and Flat do not remove noise but unwanted signal. The following Picture shows you the result of demosaicing. It is displayed in Histogram Equalization mode in order to enhanced the visibility of signal but without altering your image.
Next item of the tutorial: Registration (manual image alignment).
