new deprecation |
|||
| (4 intermediate revisions by 2 users not shown) | |||
| Line 1: | Line 1: | ||
<span style="color: #ff0090; font-weight: bold; text-align: center; margin: 2em; font-size: 125%;">This page is the old documentation for early versions of Siril 0.9. Please refer to the new documentation on [https://siril.readthedocs.io/en/stable/ siril.readthedocs.io] or the new tutorials on [https://siril.org/tutorials siril.org] instead.</span> | |||
=Tutorial for a complete image processing= | =Tutorial for a complete image processing= | ||
| Line 4: | Line 6: | ||
This tutorial will present to you which different processes you can use, however there are no absolute rules. Feel free to try many processus by adjusting parameters. We will use the image used in the preprocessing step, M8-M20. | This tutorial will present to you which different processes you can use, however there are no absolute rules. Feel free to try many processus by adjusting parameters. We will use the image used in the preprocessing step, M8-M20. | ||
==Color calibration== | |||
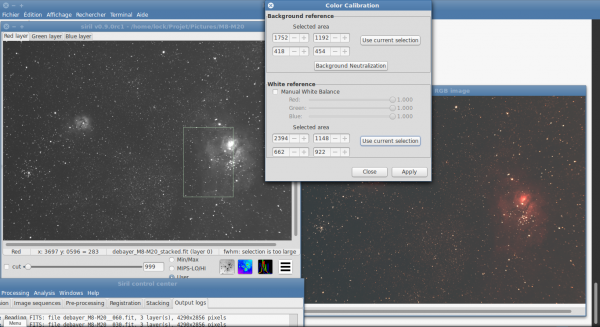
First, we need performing a balancing of the colors of a linear RGB. | |||
Siril provides a tool of color calibration. Two steps are necessary: | |||
You must select a background area with no stars and click on "select" in the "black selection" frame. Click on "background neutralization" will neutralize the background by aligning median values. | |||
In the second step, you need to select the "white selection" area. So, make a slection containing a nebula part and click on apply. Be warn that black selection MUST be always selected. | |||
However, your image must be cropped before in order to remove any frame that could misleading the tool. | |||
[[File:Siril__color_calibration_M8-M20.png|600px]] | |||
==Midtones Function Transfer== | |||
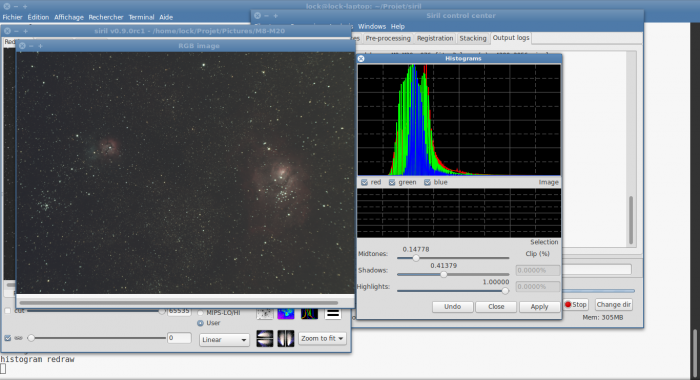
Now you have a nice stacked and calibrated linear RGB, you can convert your image to a non-linear one. Siril provides an histogram transformation called Midtones Transfer Function also used in PixInsight (http://pixinsight.com/doc/tools/HistogramTransformation/HistogramTransformation.html). | |||
By adjusting midtones sliders and shadows sliders iteratively (generally we do not use the highlight sliders) you will apply the histogram transformation. Pay attention to not clip to much pixels. Although Midtones Function Transfer is very similar to Gamma curves adjustment, they are not identical. | |||
[[File:Siril_MTF.png|700px]] | |||
==Background extraction== | ==Background extraction== | ||
| Line 15: | Line 32: | ||
[[File:Siril_gradient_rainbow.png|600px]] | [[File:Siril_gradient_rainbow.png|600px]] | ||
So, | So, this step consists to remove this sky gradient. To do that, Siril provides a [[Siril:Manual#Background_extraction|background extraction tool]]. | ||
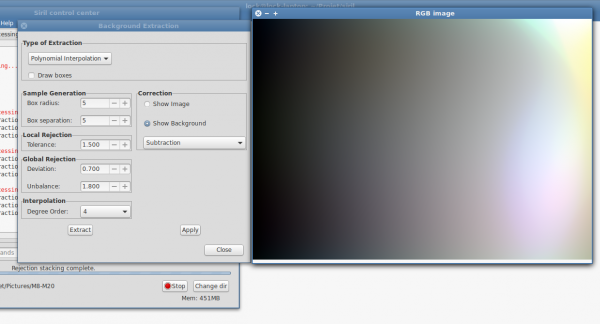
Once you have a background model with no signal from nebula (use the display mode to check everything), you can apply the correction. | |||
[[File:Siril_gradient_2D | [[File:Siril_gradient_2D.png|600px]] | ||
Two types of corrections have been implemented in Siril: | Two types of corrections have been implemented in Siril: | ||
| Line 26: | Line 43: | ||
Additive phenomena like light pollution gradients should be corrected by subtraction but multiplicative effects like vignetting should be fixed by a division. But in the last case, the correct procedure is to correct the image with flat field during pre-processing step. | Additive phenomena like light pollution gradients should be corrected by subtraction but multiplicative effects like vignetting should be fixed by a division. But in the last case, the correct procedure is to correct the image with flat field during pre-processing step. | ||
[[File: | [[File:Siril_gradient.png|600px]] | ||
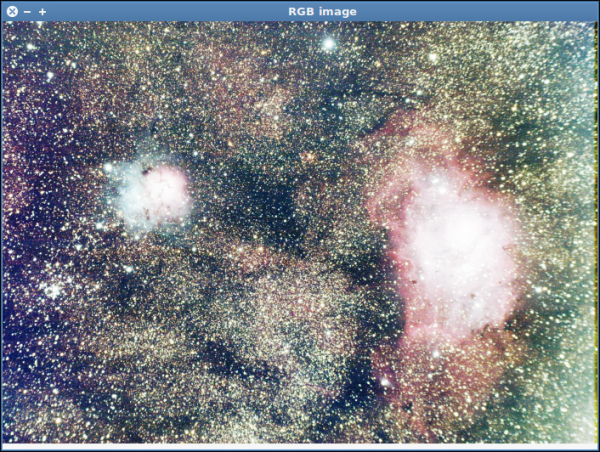
After the tool were applied, you should check the background neutralisation, and, maybe, apply a new midtone correction. | |||
[[ | ==Green Noise Reduction== | ||
Last step in this processus is to reduce the green noise with the [[Siril:Manual#Reducing_green_tint_in_processed_images|"Remove Green Noise" tool]]. | |||
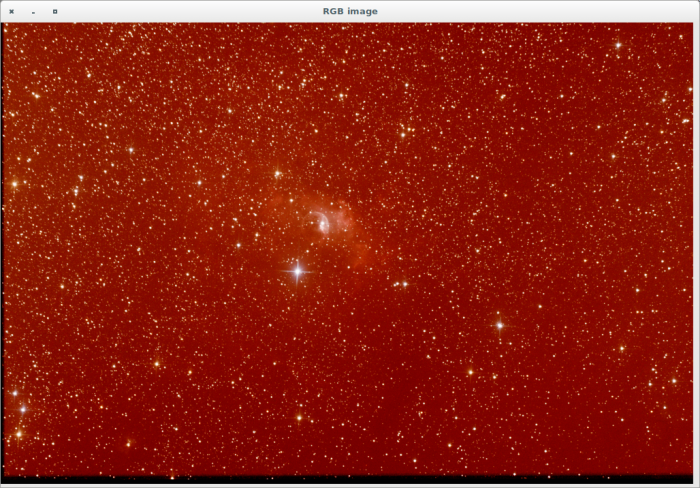
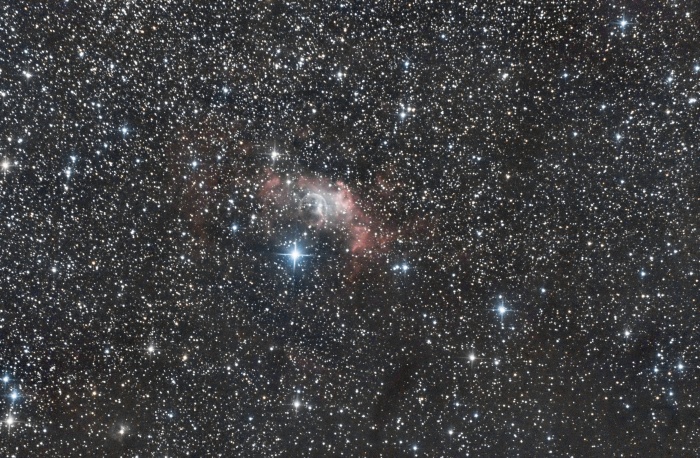
The final result is illustrated in the picture below: | |||
[[File:Siril_M8-M20_processed.png|700px]] | |||
Latest revision as of 22:37, 16 September 2023
This page is the old documentation for early versions of Siril 0.9. Please refer to the new documentation on siril.readthedocs.io or the new tutorials on siril.org instead.
Tutorial for a complete image processing
Once you get your pre-processed and stacked image (fore more details see here), the process stage can start.
This tutorial will present to you which different processes you can use, however there are no absolute rules. Feel free to try many processus by adjusting parameters. We will use the image used in the preprocessing step, M8-M20.
Color calibration
First, we need performing a balancing of the colors of a linear RGB. Siril provides a tool of color calibration. Two steps are necessary: You must select a background area with no stars and click on "select" in the "black selection" frame. Click on "background neutralization" will neutralize the background by aligning median values. In the second step, you need to select the "white selection" area. So, make a slection containing a nebula part and click on apply. Be warn that black selection MUST be always selected. However, your image must be cropped before in order to remove any frame that could misleading the tool.
Midtones Function Transfer
Now you have a nice stacked and calibrated linear RGB, you can convert your image to a non-linear one. Siril provides an histogram transformation called Midtones Transfer Function also used in PixInsight (http://pixinsight.com/doc/tools/HistogramTransformation/HistogramTransformation.html). By adjusting midtones sliders and shadows sliders iteratively (generally we do not use the highlight sliders) you will apply the histogram transformation. Pay attention to not clip to much pixels. Although Midtones Function Transfer is very similar to Gamma curves adjustment, they are not identical.
Background extraction
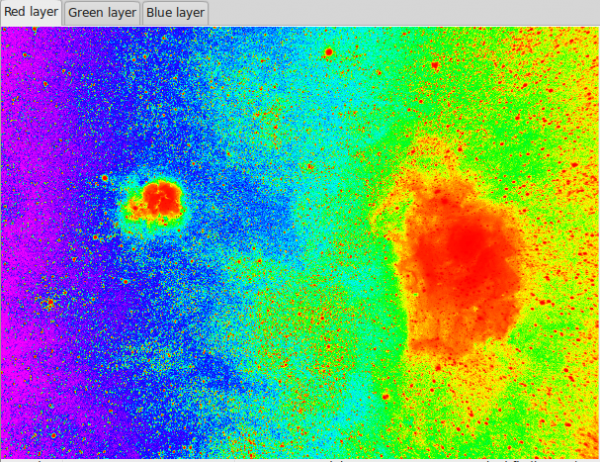
By selecting "Histogram Equalization" as display view, you can quickly check that image contains sky gradient due to light pollution, or in this case, Moon light.
The rainbow colormap can also help you to see the gradient:
So, this step consists to remove this sky gradient. To do that, Siril provides a background extraction tool.
Once you have a background model with no signal from nebula (use the display mode to check everything), you can apply the correction.
Two types of corrections have been implemented in Siril:
- Subtraction
- Division
Additive phenomena like light pollution gradients should be corrected by subtraction but multiplicative effects like vignetting should be fixed by a division. But in the last case, the correct procedure is to correct the image with flat field during pre-processing step.
After the tool were applied, you should check the background neutralisation, and, maybe, apply a new midtone correction.
Green Noise Reduction
Last step in this processus is to reduce the green noise with the "Remove Green Noise" tool.
