No edit summary |
Marked this version for translation |
||
| (22 intermediate revisions by 2 users not shown) | |||
| Line 1: | Line 1: | ||
__NOTOC__ | |||
<languages /> | <languages /> | ||
<translate> | <translate> | ||
<!--T:46--> | |||
<span style="color: #ff0090; font-weight: bold; text-align: center; margin: 2em; font-size: 125%;">This page is the old documentation for early versions of Siril 0.9. Please refer to the new documentation on [https://siril.readthedocs.io/en/stable/ siril.readthedocs.io] or the new tutorials on [https://siril.org/tutorials siril.org] instead.</span> | |||
=Siril processing tutorial= <!--T:1--> | =Siril processing tutorial= <!--T:1--> | ||
| Line 8: | Line 12: | ||
* [[Siril:Tutorial_sequence|Work on a sequence of converted images]] | * [[Siril:Tutorial_sequence|Work on a sequence of converted images]] | ||
* → '''Pre-processing images''' | * → '''Pre-processing images''' | ||
** [[#Bias (offset)|Bias (offset)]] | |||
** [[#Dark|Dark]] | |||
** [[#Flat|Flat]] | |||
** [[#Pre-processing|Pre-processing]] | |||
** [[#Results examples|Results examples]] | |||
* [[Siril:Tutorial_manual_registration|Registration (Global star alignment)]] | * [[Siril:Tutorial_manual_registration|Registration (Global star alignment)]] | ||
* [[Siril:Tutorial_stacking|Stacking]] | * [[Siril:Tutorial_stacking|Stacking]] | ||
| Line 14: | Line 23: | ||
<!--T:4--> | <!--T:4--> | ||
Once a sequence is loaded, images can be pre-processed, registered and stacked. The pre-processing is an optional | Once a sequence is loaded, images can be pre-processed, registered and stacked. The pre-processing is an optional, yet important, step and involves bias, dark and flat frames. Pre-processing a sequence in Siril can only be done with master bias, dark and flat frame, which have to be created from their sequences first. The way these master frames can be created is described in the sections below, see also the [[Siril:Tutorial_stacking|stacking documentation]]. | ||
<!--T:5--> | <!--T:5--> | ||
===Bias (offset)=== | |||
A BIAS frame is an image taken with the shutter closed and the shortest possible exposure time. Basically it corresponds to an exposure of 1/4000s with modern DSLRs. The BIAS shows the electronic noise and readout signal of the camera and the more BIAS exposures are used for the calculation of the master BIAS, the less noise will be introduced into the corrected images. | A BIAS frame, sometimes called offset frame, is an image taken with the shutter closed and the shortest possible exposure time. Basically it corresponds to an exposure of 1/4000s with modern DSLRs. The BIAS shows the electronic noise and readout signal of the camera and the more BIAS exposures are used for the calculation of the master BIAS, the less noise will be introduced into the corrected images. | ||
Note that BIAS frames MUST be taken at the same ISO than light frames. | Note that BIAS frames MUST be taken at the same ISO than light frames. The master bias frame should be created by stacking bias frames with the median algorithm (or Winsorized by checking the rejection levels at the end of the process, they should be lower than 0.5 percent), but be sure to use '''No Normalisation'''. | ||
<!--T:6--> | <!--T:6--> | ||
| Line 25: | Line 34: | ||
<!--T:31--> | <!--T:31--> | ||
12:58:34: Pixel rejection in channel #0: 0.368% - 0.354% | |||
12:58:34: Integration of 10 images: | 12:58:34: Integration of 10 images: | ||
12:58:34: Normalization ............. None | 12:58:34: Normalization ............. None | ||
12:58:34: Pixel rejection ........... Winsorized sigma clipping | 12:58:34: Pixel rejection ........... Winsorized sigma clipping | ||
12:58:34: Rejection parameters ...... low=3.200 high=3.300 | 12:58:34: Rejection parameters ...... low=3.200 high=3.300 | ||
<!--T:32--> | <!--T:32--> | ||
[[File:Siril_Offset.png]] | [[File:Siril_Offset.png|700px]] | ||
<!--T:7--> | <!--T:7--> | ||
===Dark=== | |||
Dark frames are made at the same exposure time and ISO as the subject light frames but in the dark: use your lens/telescope cap for example. They should | Dark frames are made at the same exposure time and ISO as the subject light frames but in the dark: use your lens/telescope cap or close the shutter for example. They contain the thermal noise associated with the sensor, the noise being proportional to temperature and exposure time. Hence, they should be made at approximately the same temperature as the light frames, this is the reason why we make dark frames at the end, or in the middle of the imaging session. Like with the BIAS frames, the more dark exposures are used for the calculation of the master dark, the less noise will be introduced into the corrected images. The master dark frame should be created by stacking dark frames with the median algorithm (or Winsorized by checking the rejection levels at the end of the process, they should be lower than 0.5 percent), but be sure to use '''No Normalisation'''. | ||
<!--T:43--> | |||
'''WARNING:''' Remember that dark frames are always composed from real dark signal and bias signal. If you don't apply dark optimization, you can leave the bias signal and your masterDark will be in fact <math>masterDark + masterBias</math>. In consequence subtracting this master to the light frames will remove both signals. However, applying dark optimization makes things different by multiplying masterDark by a coefficient factor not equal to 1. In this case, you must subtract masterBias from each dark frame. | |||
<!--T:8--> | <!--T:8--> | ||
| Line 42: | Line 54: | ||
<!--T:33--> | <!--T:33--> | ||
13:00:40: Pixel rejection in channel #0: 0.340% - 0.384% | |||
13:00:40: Integration of 10 images: | 13:00:40: Integration of 10 images: | ||
13:00:40: Normalization ............. None | 13:00:40: Normalization ............. None | ||
13:00:40: Pixel rejection ........... Winsorized sigma clipping | 13:00:40: Pixel rejection ........... Winsorized sigma clipping | ||
13:00:40: Rejection parameters ...... low=3.200 high=3.300 | 13:00:40: Rejection parameters ...... low=3.200 high=3.300 | ||
<!--T:34--> | <!--T:34--> | ||
[[File:Siril_Dark.png]] | [[File:Siril_Dark.png|700px]] | ||
<!--T:9--> | <!--T:9--> | ||
===Flat=== | |||
Telescopes usually do not illuminate the detector homogeneously. Moreover, dust on optical surfaces and sensor lead to | Telescopes usually do not illuminate the detector homogeneously. Moreover, dust on optical surfaces and sensor lead to darker patterns on resulting image, and the sensor itself has a different response to the number of photons hitting different photosites. To correct these effects one need to divide each light images by the master flat, which should be the median of single exposures of a homogeneously and non-saturating illuminated area. | ||
<!--T:44--> | |||
'''WARNING:''' Remember that flat frames are always composed from real flat signal and bias signal. So you must subtract master-bias from each flat frames to obtain real master-flat. In addition, if flat frame exposures are too long, a dark-flat signal should also be removed. | |||
<!--T:10--> | <!--T:10--> | ||
Siril automatically evaluates the normalisation coefficient used in the flat division. However, this value can be | Siril automatically evaluates the normalisation coefficient used in the flat division. However, this value can be self-evaluated. | ||
<!--T: | <!--T:45--> | ||
The master flat frame should be created by stacking flat frames with the median algorithm (or Winsorized by checking the rejection levels at the end of the process, which should be lower than 0.500), and choose '''Multiplicative normalisation'''. | |||
<!--T:13--> | <!--T:13--> | ||
Here, a master flat, calculated from 9 single images with Winsorized sigma clipping method. Note that vignetting and dust are visible. Bayer pattern is also visible | Here, a master flat, calculated from 9 single images with Winsorized sigma clipping method. Note that vignetting and dust are visible. Bayer pattern is also visible. | ||
<!--T:14--> | <!--T:14--> | ||
13:05:23: Pixel rejection in channel #0: 0.388% - 0.304% | |||
13:05:23: Integration of 9 images: | 13:05:23: Integration of 9 images: | ||
13:05:23: Normalization ............. multiplicative | 13:05:23: Normalization ............. multiplicative | ||
13:05:23: Pixel rejection ........... Winsorized sigma clipping | 13:05:23: Pixel rejection ........... Winsorized sigma clipping | ||
13:05:23: Rejection parameters ...... low=3.400 high=3.700 | 13:05:23: Rejection parameters ...... low=3.400 high=3.700 | ||
<!--T:35--> | <!--T:35--> | ||
[[File:Siril_Flat.png]] | [[File:Siril_Flat.png|700px]] | ||
<!--T: | <!--T:36--> | ||
===Pre-processing=== | |||
The preprocessing operation consists | The preprocessing operation consists in computing the following equation:<br /> | ||
calibrated image <math>= \frac{light - masterDark - masterBias}{masterFlat - masterFlatDark - masterBias}</math><br /> | calibrated image <math>= \frac{light - masterDark - masterBias}{masterFlat - masterFlatDark - masterBias}</math><br /> | ||
For DSLR images, when dark optimization is not used, one good method is to process like that: | <!--T:37--> | ||
For DSLR images, when dark optimization is not used and masterFlatDark not needed, one good method is to process like that: | |||
* Integrate all bias to build master-bias | * Integrate all bias to build master-bias | ||
* | * Integrate all darks to build master-dark | ||
* Calibrate flat frames with master-bias | * Calibrate flat frames with master-bias | ||
* Integrate all calibrated flat to build master-flat | * Integrate all calibrated flat to build master-flat | ||
* Preprocess light frame with master-dark and master-flat | * Preprocess light frame with master-dark and master-flat | ||
If you want to do the whole processing batch, with dark optimization, | <!--T:38--> | ||
If you want to do the whole processing batch, once again with no masterFlatDark but with dark optimization, you must remove the master-bias from the master-dark before: | |||
* Integrate all bias to build master-bias | * Integrate all bias to build master-bias | ||
* Calibrate dark frames with master-bias | * Calibrate dark frames with master-bias | ||
* | * Integrate all calibrated darks to build master-dark | ||
* Calibrate flat frames with master-bias | * Calibrate flat frames with master-bias | ||
* Integrate all calibrated flat to build master-flat | * Integrate all calibrated flat to build master-flat | ||
| Line 99: | Line 112: | ||
<!--T:16--> | <!--T:16--> | ||
The pre-processing does not overwrites original FITS files from the sequence but creates new FITS files with the pre-processed data. The new file names are the same than the original prefixed with pp_ if you leave the default value in the prefix box. Below is an example of pre-processing using offset and dark files. | The pre-processing does not overwrites original FITS files from the sequence but creates new FITS files with the pre-processed data. The new file names are the same than the original prefixed with <tt>pp_</tt> if you leave the default value in the prefix box. Below is an example of pre-processing using offset and dark files. Make sure that loaded sequence is the sequence of your light frames. Also, note that at the end of the process, the new sequence is automatically loaded. | ||
Make sure that loaded sequence is the sequence of your light frames. Also, note that at the end of the process, the new sequence is loaded. | |||
<!--T:17--> | <!--T:17--> | ||
[[File:Siril preprocessing screen.png]] | [[File:Siril preprocessing screen.png|700px]] | ||
Since 0.9.2 version, a new tool is available in | <!--T:39--> | ||
Since 0.9.2 version, a new tool is available in the preprocessing tab: cosmetic correction. This tool search deviant pixels through master-dark and will correct them. You always should use this tool if you own master-dark. Please, pay attention to the CFA box. Check it if your monochrome pictures are CFA images. If you don't have master-dark (which should be avoided), you could use automatic cosmetic correction tool available through the "image processing" menu. | |||
===Results examples=== <!--T:40--> | |||
<!--T:18--> | <!--T:18--> | ||
The result of a single frame pre-processed is given below. Note how dust have been removed from the light frame. | The result of a single frame pre-processed is given below. Note how dust have been removed from the light frame. | ||
<!--T:19--> | <!--T:19--> | ||
[[File:Siril_before_DOF.png]] | [[File:Siril_before_DOF.png|700px]] | ||
[[File:Siril_after_DOF.png]] | [[File:Siril_after_DOF.png|700px]] | ||
<!--T:20--> | <!--T:20--> | ||
| Line 119: | Line 133: | ||
<!--T:21--> | <!--T:21--> | ||
[[File:DOF.gif]] | [[File:DOF.gif|700px]] | ||
===Special case of demosaicing=== <!--T:41--> | |||
<!--T:22--> | <!--T:22--> | ||
* Demosaicing (for Bayer-Pattern images only) | * Demosaicing (for Bayer-Pattern images only) | ||
Last step in pre-processing images consist in getting back Red, Green and Blue channels using interpolation algorithms. To do that, Siril gives the choice between | Last step in pre-processing images consist in getting back Red, Green and Blue channels using interpolation algorithms. To do that, Siril gives the choice between 5 different algorithms. | ||
* VNG (default) | |||
* Bilinear (low quality but fast) | |||
* Nearest neighboor | |||
* AHD | |||
Make your choice in the window below by clicking on Settings and Debayer tab. | * Super Pixel (no interpolation, the pattern RGGB, or other, is used as a super pixel and the image size is divided by four). | ||
<!--T:42--> | |||
Make your choice in the window below by clicking on Settings and Other Debayer tab. | |||
<!--T:23--> | <!--T:23--> | ||
[[File:Siril_Debayer.png]] | [[File:Siril_Debayer.png|400px]] | ||
<!--T:24--> | <!--T:24--> | ||
| Line 137: | Line 156: | ||
<!--T:25--> | <!--T:25--> | ||
[[File:Siril_conversion_demosaicing.png]] | [[File:Siril_conversion_demosaicing.png|700px]] | ||
<!--T:26--> | <!--T:26--> | ||
Then check the | Then check the Demosaicing button and click on the Convert Button right after. The demosaicing process should start and will take some time following the method you used and the CPU you own. | ||
<!--T:27--> | <!--T:27--> | ||
[[File:Siril_during_demosaicing.png]] | [[File:Siril_during_demosaicing.png|700px]] | ||
<!--T:28--> | <!--T:28--> | ||
Finally you will have a new set of pre-processed light frames, automatically loaded in Siril, that you could register. Please note that at this stage you always have a lot of noise in your image. Indeed, pre-processing images with Dark, Bias and Flat do not remove noise but unwanted signal. The following Picture shows you the result of demosaicing. It is displayed in | Finally you will have a new set of pre-processed light frames, automatically loaded in Siril, that you could register. Please note that at this stage you always have a lot of noise in your image. Indeed, pre-processing images with Dark, Bias and Flat do not remove noise but unwanted signal. The following Picture shows you the result of demosaicing. It is displayed in Auto-stretch visualisation mode in order to enhanced the visibility of signal but without altering your image. | ||
<!--T:29--> | <!--T:29--> | ||
[[File:Siril_demosaicing_final.png]] | [[File:Siril_demosaicing_final.png|700px]] | ||
<!--T:30--> | <!--T:30--> | ||
Next item of the tutorial: [[Siril:Tutorial_manual_registration|Registration ( | Next item of the tutorial: [[Siril:Tutorial_manual_registration|Registration (Global star alignment)]]. | ||
</translate> | </translate> | ||
Latest revision as of 22:41, 16 September 2023
This page is the old documentation for early versions of Siril 0.9. Please refer to the new documentation on siril.readthedocs.io or the new tutorials on siril.org instead.
Siril processing tutorial
- Convert your images in the FITS format Siril uses (image import)
- Work on a sequence of converted images
- → Pre-processing images
- Registration (Global star alignment)
- Stacking
Pre-processing images
Once a sequence is loaded, images can be pre-processed, registered and stacked. The pre-processing is an optional, yet important, step and involves bias, dark and flat frames. Pre-processing a sequence in Siril can only be done with master bias, dark and flat frame, which have to be created from their sequences first. The way these master frames can be created is described in the sections below, see also the stacking documentation.
Bias (offset)
A BIAS frame, sometimes called offset frame, is an image taken with the shutter closed and the shortest possible exposure time. Basically it corresponds to an exposure of 1/4000s with modern DSLRs. The BIAS shows the electronic noise and readout signal of the camera and the more BIAS exposures are used for the calculation of the master BIAS, the less noise will be introduced into the corrected images. Note that BIAS frames MUST be taken at the same ISO than light frames. The master bias frame should be created by stacking bias frames with the median algorithm (or Winsorized by checking the rejection levels at the end of the process, they should be lower than 0.5 percent), but be sure to use No Normalisation.
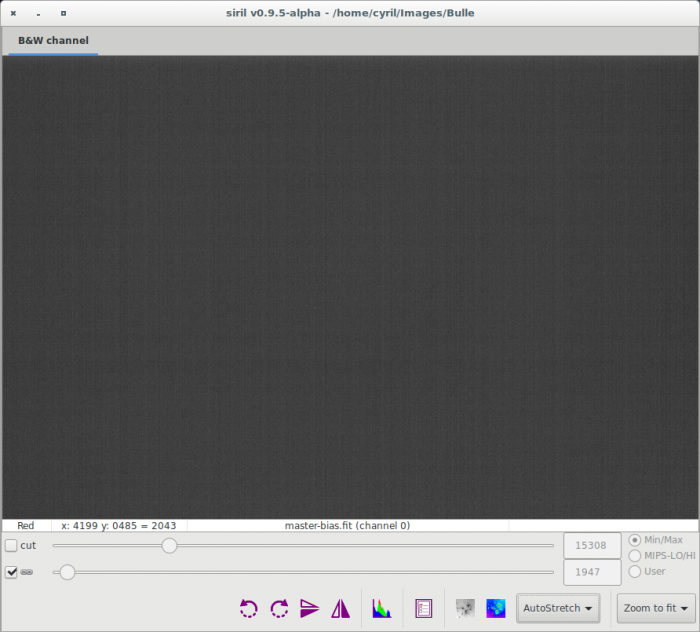
Here, a master BIAS, calculated from 10 single images with Winsorized sigma clipping.
   12:58:34: Pixel rejection in channel #0: 0.368% - 0.354%
   12:58:34: Integration of 10 images:
   12:58:34: Normalization ............. None
   12:58:34: Pixel rejection ........... Winsorized sigma clipping
   12:58:34: Rejection parameters ...... low=3.200 high=3.300
Dark
Dark frames are made at the same exposure time and ISO as the subject light frames but in the dark: use your lens/telescope cap or close the shutter for example. They contain the thermal noise associated with the sensor, the noise being proportional to temperature and exposure time. Hence, they should be made at approximately the same temperature as the light frames, this is the reason why we make dark frames at the end, or in the middle of the imaging session. Like with the BIAS frames, the more dark exposures are used for the calculation of the master dark, the less noise will be introduced into the corrected images. The master dark frame should be created by stacking dark frames with the median algorithm (or Winsorized by checking the rejection levels at the end of the process, they should be lower than 0.5 percent), but be sure to use No Normalisation.
WARNING: Remember that dark frames are always composed from real dark signal and bias signal. If you don't apply dark optimization, you can leave the bias signal and your masterDark will be in fact [math]\displaystyle{ masterDark + masterBias }[/math]. In consequence subtracting this master to the light frames will remove both signals. However, applying dark optimization makes things different by multiplying masterDark by a coefficient factor not equal to 1. In this case, you must subtract masterBias from each dark frame.
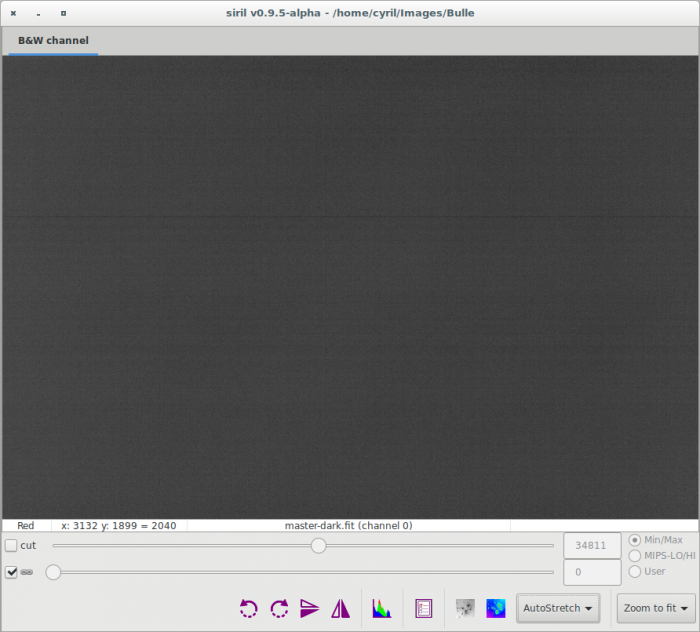
Here, a master dark, calculated from 10 single images with Winsorized sigma clipping.
   13:00:40: Pixel rejection in channel #0: 0.340% - 0.384%
   13:00:40: Integration of 10 images:
   13:00:40: Normalization ............. None
   13:00:40: Pixel rejection ........... Winsorized sigma clipping
   13:00:40: Rejection parameters ...... low=3.200 high=3.300
Flat
Telescopes usually do not illuminate the detector homogeneously. Moreover, dust on optical surfaces and sensor lead to darker patterns on resulting image, and the sensor itself has a different response to the number of photons hitting different photosites. To correct these effects one need to divide each light images by the master flat, which should be the median of single exposures of a homogeneously and non-saturating illuminated area.
WARNING: Remember that flat frames are always composed from real flat signal and bias signal. So you must subtract master-bias from each flat frames to obtain real master-flat. In addition, if flat frame exposures are too long, a dark-flat signal should also be removed.
Siril automatically evaluates the normalisation coefficient used in the flat division. However, this value can be self-evaluated.
The master flat frame should be created by stacking flat frames with the median algorithm (or Winsorized by checking the rejection levels at the end of the process, which should be lower than 0.500), and choose Multiplicative normalisation.
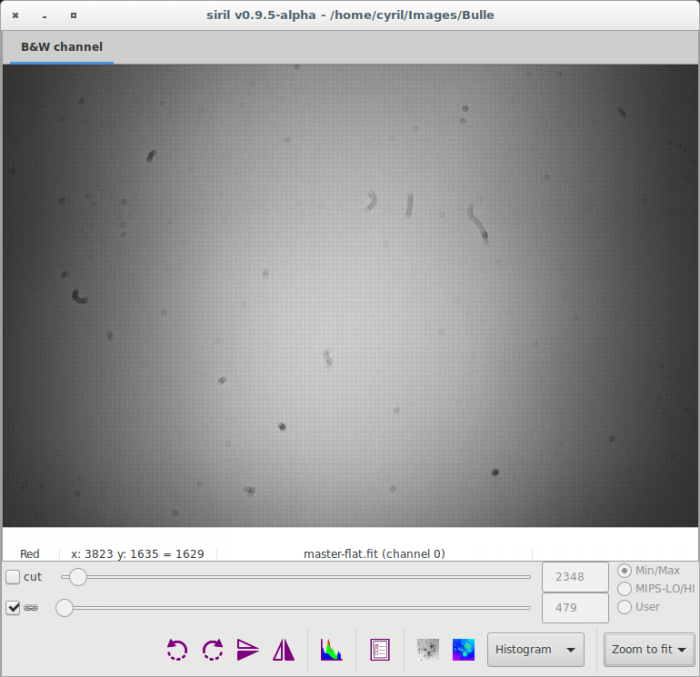
Here, a master flat, calculated from 9 single images with Winsorized sigma clipping method. Note that vignetting and dust are visible. Bayer pattern is also visible.
   13:05:23: Pixel rejection in channel #0: 0.388% - 0.304%
   13:05:23: Integration of 9 images:
   13:05:23: Normalization ............. multiplicative
   13:05:23: Pixel rejection ........... Winsorized sigma clipping
   13:05:23: Rejection parameters ...... low=3.400 high=3.700
Pre-processing
The preprocessing operation consists in computing the following equation:
calibrated image [math]\displaystyle{ = \frac{light - masterDark - masterBias}{masterFlat - masterFlatDark - masterBias} }[/math]
For DSLR images, when dark optimization is not used and masterFlatDark not needed, one good method is to process like that:
- Integrate all bias to build master-bias
- Integrate all darks to build master-dark
- Calibrate flat frames with master-bias
- Integrate all calibrated flat to build master-flat
- Preprocess light frame with master-dark and master-flat
If you want to do the whole processing batch, once again with no masterFlatDark but with dark optimization, you must remove the master-bias from the master-dark before:
- Integrate all bias to build master-bias
- Calibrate dark frames with master-bias
- Integrate all calibrated darks to build master-dark
- Calibrate flat frames with master-bias
- Integrate all calibrated flat to build master-flat
- Preprocess light frame with master-bias, master-dark and master-flat
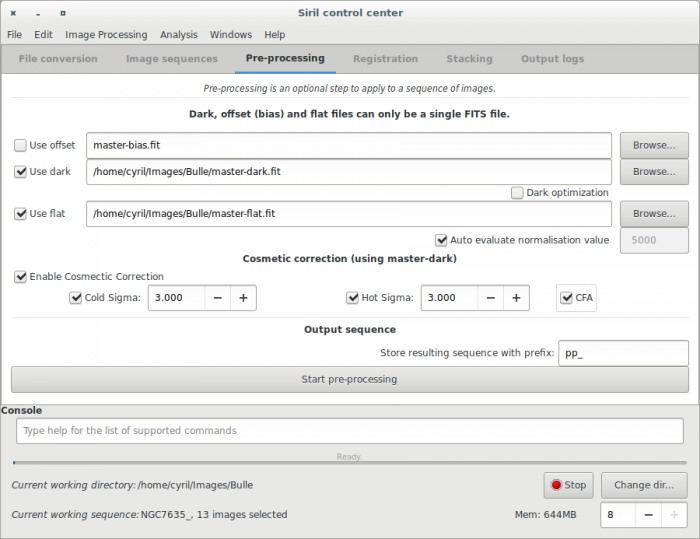
The pre-processing does not overwrites original FITS files from the sequence but creates new FITS files with the pre-processed data. The new file names are the same than the original prefixed with pp_ if you leave the default value in the prefix box. Below is an example of pre-processing using offset and dark files. Make sure that loaded sequence is the sequence of your light frames. Also, note that at the end of the process, the new sequence is automatically loaded.
Since 0.9.2 version, a new tool is available in the preprocessing tab: cosmetic correction. This tool search deviant pixels through master-dark and will correct them. You always should use this tool if you own master-dark. Please, pay attention to the CFA box. Check it if your monochrome pictures are CFA images. If you don't have master-dark (which should be avoided), you could use automatic cosmetic correction tool available through the "image processing" menu.
Results examples
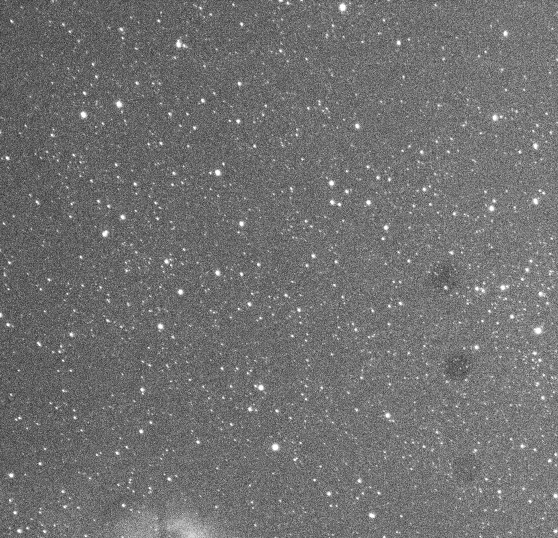
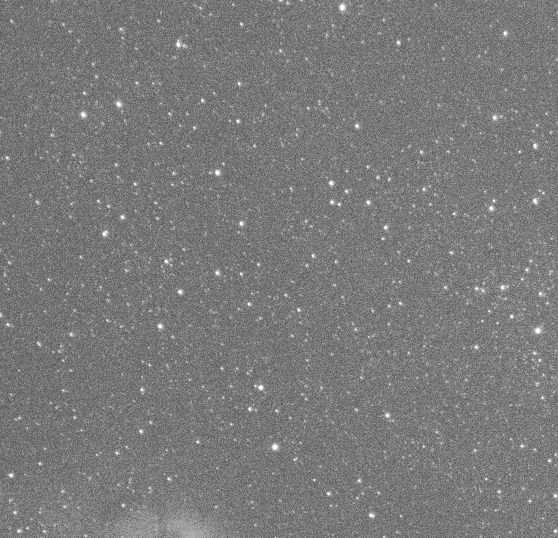
The result of a single frame pre-processed is given below. Note how dust have been removed from the light frame.
Another example of a well executed pre-processing stage is illustrated in the next animation. Look how the pixels of the thermal signal are removed from the picture.
Special case of demosaicing
- Demosaicing (for Bayer-Pattern images only)
Last step in pre-processing images consist in getting back Red, Green and Blue channels using interpolation algorithms. To do that, Siril gives the choice between 5 different algorithms.
- VNG (default)
- Bilinear (low quality but fast)
- Nearest neighboor
- AHD
- Super Pixel (no interpolation, the pattern RGGB, or other, is used as a super pixel and the image size is divided by four).
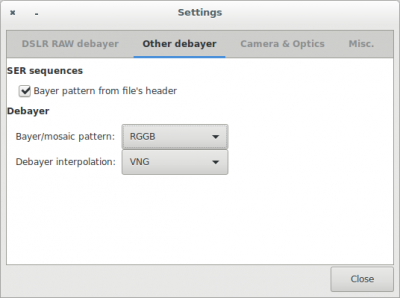
Make your choice in the window below by clicking on Settings and Other Debayer tab.
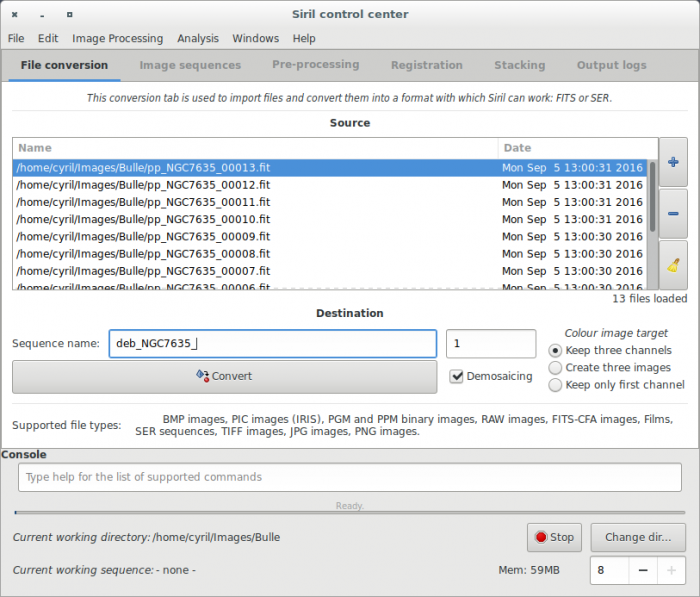
To process the demosaicing, go back to Conversion Tab and fill the field as the example below:
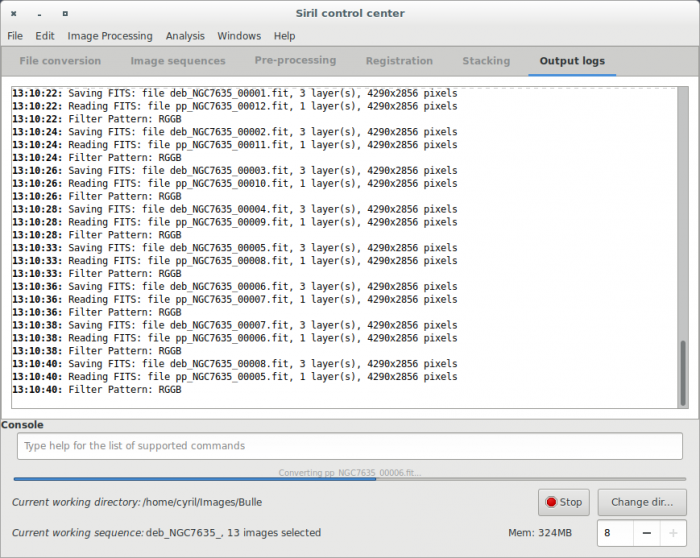
Then check the Demosaicing button and click on the Convert Button right after. The demosaicing process should start and will take some time following the method you used and the CPU you own.
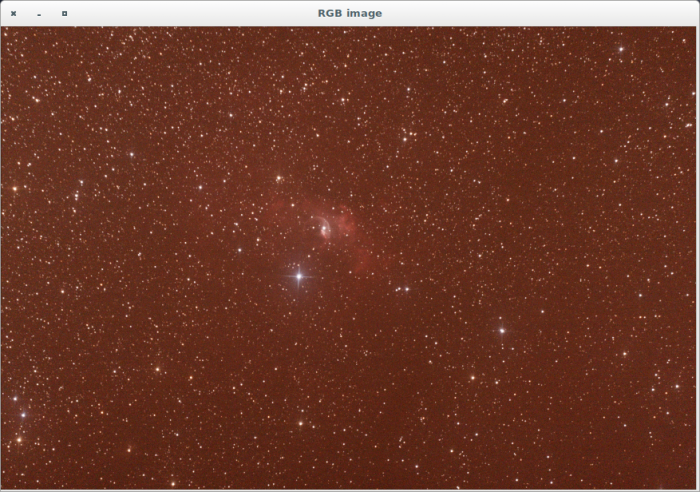
Finally you will have a new set of pre-processed light frames, automatically loaded in Siril, that you could register. Please note that at this stage you always have a lot of noise in your image. Indeed, pre-processing images with Dark, Bias and Flat do not remove noise but unwanted signal. The following Picture shows you the result of demosaicing. It is displayed in Auto-stretch visualisation mode in order to enhanced the visibility of signal but without altering your image.
Next item of the tutorial: Registration (Global star alignment).
