Siril processing tutorial
- Convert your images in the FITS format Siril uses (image import)
- Work on a sequence of converted images
- Pre-processing images
- Registration (Global star alignment)
- → Stacking
Empilement
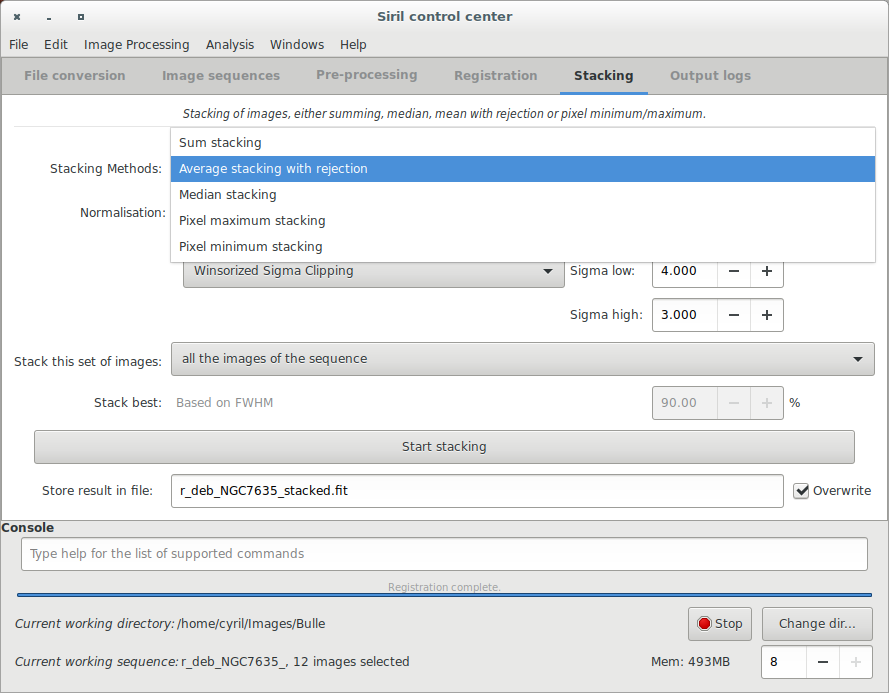
L'étape finale consiste à empiler les images. Pour ce faire, allez dans l'onglet "stacking" et indiquez si vous voulez empiler toutes les images ou seulement les meilleurs images au regard des valeurs FWHM calculées lors de l'alignement. Siril propose plusieurs algorithmes d'empilement.
- Sum Stacking
Il s'agit du plus simple algorithme. Chaque pixel dans la pile est sommé utilisant une précision de 32bits. et le résultat est normalisé sur 16bits. L'augmentation du rapport signal sur bruit (SNR) est proportionnel à [math]\displaystyle{ \sqrt{N} }[/math], où [math]\displaystyle{ N }[/math] est le nombre d'image. A cause de l'absence de normalisation, il est recommandé d'utiliser cette algorithme pour l'empilement des images planétaires.
- Average Stacking With Rejection
- Percentile Clipping : il s'agit d'un algorithme de rejet en une étape idéal pour les petits jeu d'images (jusqu'à 6 images)
- Sigma Clipping : c'est un algorithme qui va rejeter les pixels dont la distance à la médiane sera plus grande que les 2 valeurs donné en unité sigma([math]\displaystyle{ \sigma_{low} }[/math], [math]\displaystyle{ \sigma_{high} }[/math]).
- Median Sigma Clipping : il s'agit du même algorithme que précédemment, excepté que le pixel rejeté est remplacé par la valeur médiane de la pile.
- Winsorized Sigma Clipping : cette algorithme est très similaire à la méthode Sigma Clipping mais il utilise un algorithme basé sur les travaux de Huber [1] [2].
- Linear Fit Clipping : il s'agit d'un algorithme développé par Juan Conejero, principal développeur de PixInsight [2]. Il pratique un ajustement d'une droite ([math]\displaystyle{ y=ax+b }[/math]) de la pile des pixel et rejette les pixels déviants. Cette algorithme marche très bien avec des jeux d'images très important et lorsque le ciel contient des différences de gradient.
These algorithms are very efficient to remove satellite/plane tracks.
- Median Stacking
This method is mostly used for dark/flat/offset stacking. The median value of the pixels in the stack is computed for each pixel. As this method should only be used for dark/flat/offset stacking, it does not take into account shifts computed during registration. The increase in SNR is proportional to [math]\displaystyle{ 0.8\sqrt{N} }[/math].
- Pixel Maximum Stacking
This algorithm is mainly used to construct long exposure star-trails images. Pixels of the image are replaced by pixels at the same coordinates if intensity is greater.
- Pixel Minimum Stacking
This algorithm is mainly used for cropping sequence by removing black borders. Pixels of the image are replaced by pixels at the same coordinates if intensity is lower.
In the case of NGC7635 sequence, we first used the "Winsorized Sigma Clipping" algorithm in "Average stacking with rejection" section, in order to remove satellite tracks ([math]\displaystyle{ \sigma_{low}=4 }[/math] and [math]\displaystyle{ \sigma_{high}=3 }[/math]).
The output console thus gives the following result:
22:26:06: Pixel rejection in channel #0: 0.215% - 1.401%

22:26:06: Pixel rejection in channel #1: 0.185% - 1.273%

22:26:06: Pixel rejection in channel #2: 0.133% - 1.150%

22:26:06: Integration of 12 images:

22:26:06: Normalization ............. additive + scaling

22:26:06: Pixel rejection ........... Winsorized sigma clipping

22:26:06: Rejection parameters ...... low=4.000 high=3.000

22:26:09: Saving FITS: file NGC7635.fit, 3 layer(s), 4290x2856 pixels

22:26:19: Background noise value (channel: #0): 10.013 (1.528e-04)

22:26:19: Background noise value (channel: #1): 6.755 (1.031e-04)

22:26:19: Background noise value (channel: #2): 6.621 (1.010e-04)
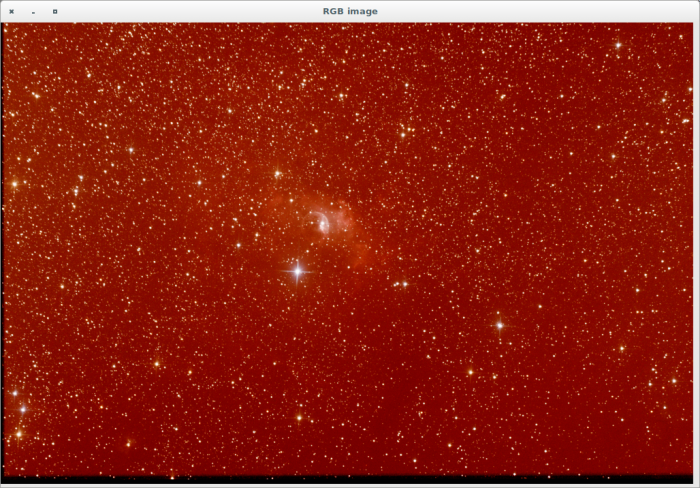
After that, the result is saved in the file named below the buttons, and is displayed in the grey and colour windows. You can adjust levels if you want to see it better, or use the differe1nt display mode. In our example the file is the stack result of all files, i.e., 12 files.
The images above picture the result in Siril using the Auto-Stretch rendering mode. Note the improvement of the signal-to-noise ratio regarding the result given for one frame in the previous step (take a look to the sigma value). The increase in SNR is of [math]\displaystyle{ 19.7/6.4 = 3.08 \approx \sqrt{12} = 3.46 }[/math] and you should try to improve this result adjusting [math]\displaystyle{ \sigma_{low} }[/math] and [math]\displaystyle{ \sigma_{high} }[/math].
Now should start the process of the image with crop, background extraction (to remove gradient), and some other processes to enhance your image. To see processes available in Siril please visit this page.
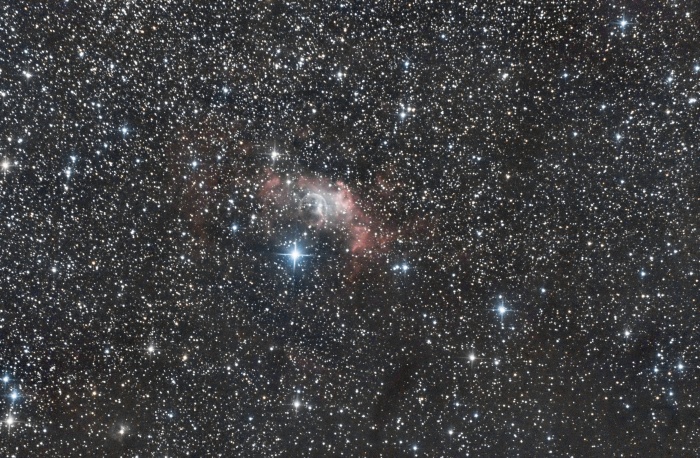
Here an example of what you can get with Siril:

End of the processing tutorial. Return to the main documentation page for more illustrated tutorials.


